


Knowing how to secure a polytunnel cover starts with fixing it securely around its perimeter and evenly tensioning it across the frame. The aim is not simply to pull the polythene as tight as possible, but to create a stable cover with as little unnecessary movement as possible.
It is also worth making one distinction at the outset. Securing the cover is not the same as anchoring the whole polytunnel structure to the ground. The frame needs to be stable in its own right, while the cover needs to be properly fixed to that frame.
There are several ways to secure a cover, including trenching, timber or batten fixing, and rail-based systems. The right approach depends on the tunnel and the fixing arrangement it has been designed for.

Key points
- Prepare the frame, cover, fixings and working area before you start.
- Choose calm weather rather than trying to handle a large sheet of polythene in strong wind.
- Fix progressively and aim for even tension across the cover.
- Take particular care around doors and gable ends.
- Do not trim excess material until the cover is correctly positioned and secured.
What is the best way to secure a polytunnel cover?
There is no single fixing method that suits every polytunnel. Trenching, timber or batten fixing and rail-based systems all retain the cover in different ways.
The two principles that matter most are secure perimeter fixing and even tension. The cover should sit reasonably smoothly across the frame without obvious loose sections that can move unnecessarily.
Polytunnel cover fixing methods at a glance
| Fixing method | How it works | Main consideration |
|---|---|---|
| Trenching | The cover edge is taken into a perimeter trench and secured with soil | The cover needs to be positioned and tensioned carefully before the trench is finished |
| Timber or batten fixing | The cover is fixed against an appropriate timber surface | Accurate positioning is important before final fixing |
| Rail-based fixing | The cover is retained in a dedicated fixing rail | Follow the fitting process for the particular rail system |
If you want more detail on the different approaches, you can learn more on securing a polytunnel cover with trenches or base rails.
The important thing is to use the fixing system intended for your tunnel rather than trying to improvise a combination of methods.
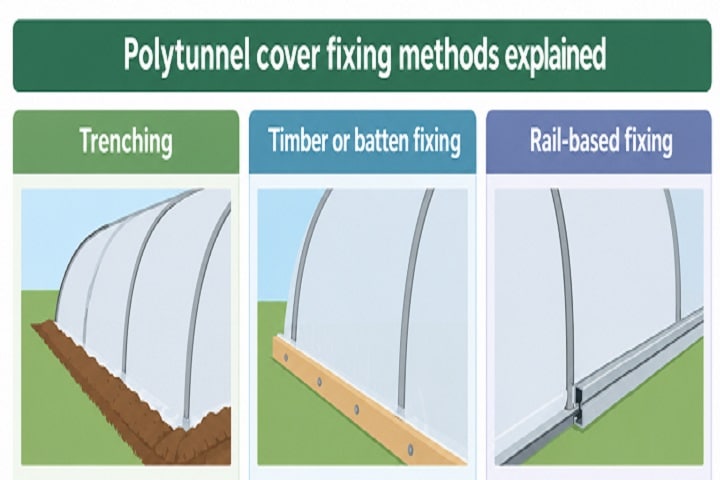
Polytunnel cover fixing methods explained
Trenching
With trench fixing, the edge of the cover extends beyond the frame and is taken into a trench around the perimeter. Soil is then used to secure the material.
This can be a straightforward method, but positioning matters. If one side is fixed too early, it can make it harder to centre and tension the cover properly elsewhere.
Timber or batten fixing
A cover can also be fixed against an appropriate timber surface using suitable fixings.
The same principle applies here. Get the cover into the correct position first, then fix it progressively. Small adjustments are much easier before everything has been secured.
Rail-based fixing
Rail-based systems use a dedicated rail or fixing arrangement to retain the cover around the frame.
The exact process varies between systems, so the manufacturer’s instructions should always take precedence. The underlying aim remains the same: a secure perimeter and consistent tension.
Prepare before you fit the cover
Covering a polytunnel is one of those jobs where preparation can make everything that follows easier.
Before you begin, check that:
- The frame is correctly positioned and ready for the cover.
- There are no sharp edges or protruding parts that could damage the polythene.
- The cover is correctly oriented and ready to be positioned.
- All tools and fixing materials are within reach.
- You have enough people to handle the cover safely and evenly, particularly on larger tunnels.
- Conditions are calm enough to work with a large sheet of material.
Wind is particularly important. A large cover can become surprisingly difficult to control once it catches the breeze. Waiting for a suitable day is usually much easier than trying to wrestle with the weather.
How to fit and secure a polytunnel cover
Once everything is ready, work slowly and progressively.
1. Position the cover
Start by centering the cover over the tunnel. Take time to make sure the material is distributed correctly before beginning the permanent fixing.
2. Pull the cover over the frame
Move the cover carefully over the structure, keeping it aligned as you go. For a larger tunnel, several people may be needed to handle the material evenly.
Avoid dragging the cover unnecessarily across anything that could damage it.
3. Begin fixing
Secure the appropriate end according to the fixing system being used.
Do not try to remove every wrinkle immediately. The cover still needs to settle into position across the rest of the frame.
4. Work progressively around the perimeter
Continue fixing the cover in stages, maintaining even tension as you go.
Think about the whole structure rather than pulling one small section as tight as possible. The aim is to distribute the tension rather than move the problem from one area to another.
5. Secure the opposite side or end
Once the cover is correctly positioned, secure the remaining perimeter using the appropriate fixing method.
If the cover has stayed centred during the earlier stages, there should be a more even distribution of material around the frame.
6. Finish the doors and gable ends
The ends often need more attention than the long sides. Make sure the cover follows the shape of the end structure and does not leave large loose sections around doors or corners.
7. Complete the perimeter
Finish the fixing around the whole tunnel before trimming away excess material.
This leaves you with an opportunity to make final adjustments while you still have enough material to work with.
How tight should a polytunnel cover be?
The aim is even tension, not maximum tension.
A properly fitted cover should look reasonably smooth across the frame, without obvious loose areas that can move unnecessarily in the wind.
That does not mean every part of the polythene will be perfectly wrinkle-free. Some variation is natural, particularly around doors and more complicated sections of the frame.
What you want to avoid is a visibly slack area beside one section that has been pulled much tighter.
The best way to achieve consistent tension is to maintain it progressively as you fix the cover.
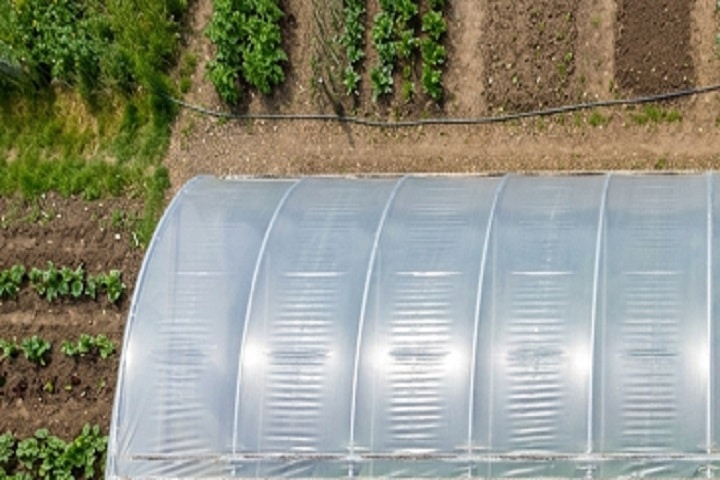
Good tension: the cover sits smoothly and consistently across the frame.
Poor tension: there are obvious loose sections or areas that can flap unnecessarily.
Securing the cover around doors and ends
Doors and gable ends are often where an otherwise neat installation can become untidy.
The cover needs to follow the shape of the end structure before final fixing. Avoid leaving large amounts of loose material gathered around the door or corners.
Work gradually, arranging the cover so it sits neatly against the structure. The exact fixing details depend on the tunnel design, but the basic process remains the same: position, tension, then secure.
This is also where patience matters. Avoid cutting away material simply because there seems to be too much of it.
Once it has been cut, you cannot put it back.
Common mistakes when securing a polytunnel cover
Fitting in strong wind
Why it matters: A large sheet of polythene becomes difficult to control and position.
Do instead: Choose calm, suitable conditions.
Leaving too much slack
Why it matters: Loose sections can move unnecessarily.
Do instead: Maintain even tension as you work around the perimeter.
Pulling one section much tighter than another
Why it matters: This can create uneven tension across the cover.
Do instead: Consider the whole structure rather than trying to perfect one small area.
Ignoring sharp edges
Why it matters: Anything pressing or rubbing against the polythene can potentially damage the cover.
Do instead: Inspect the frame carefully before fitting.
Cutting excess material too soon
Why it matters: You may remove material needed for final positioning.
Do instead: Establish the final position and tension before trimming.
Final checks before you leave the polytunnel
Before calling the installation finished, walk around the entire structure and check:
- Is the cover securely retained around the full perimeter?
- Does the tension look reasonably even?
- Are there any obvious loose sections?
- Have the doors and gable ends been finished neatly?
- Is any part of the frame likely to rub against the cover?
- Have you waited until the final position was established before trimming excess material?
It is a simple check, but it is worth doing properly. Small problems are much easier to correct while you are still standing beside the tunnel.
Practical polytunnel fitting from First Tunnels
At First Tunnels, we know that the practical details matter. A polytunnel is not simply a frame with a sheet of polythene placed over it. The relationship between the frame, cover and fixing system affects how the finished structure looks and performs.
That is why the fixing arrangement is worth considering when choosing a tunnel, rather than treating it as an afterthought once the structure is standing.
If you are planning a new tunnel, you can choose a polytunnel with the right cover-fixing system for your growing space and how you intend to use it.
Good installation starts before the cover is lifted onto the frame. A little preparation, suitable weather and a patient approach can make the whole process considerably easier.
Conclusion
Securing a polytunnel cover comes down to reliable perimeter fixing and even tension. Trenching, timber or batten fixing and rail-based systems can all provide effective solutions, depending on the tunnel design.
Prepare carefully, work progressively and give the doors and ends particular attention. Then take a final walk around the whole structure before considering the job complete.
Frequently Asked Questions
What is the best way to secure a polytunnel cover?
There is no single method for every tunnel. Trenching, timber or batten fixing and rail-based systems can all be used, depending on the design and fixing arrangement.
What weather is best for fitting a polytunnel cover?
Calm weather is preferable. Large sheets of polythene can be difficult to handle in strong wind, making it harder to position and tension the cover evenly.
Can you secure a polytunnel cover without burying it?
Yes. Trenching is one option, but timber or batten fixing and rail-based systems provide other approaches, depending on the tunnel structure.
How tight should a polytunnel cover be?
It should be evenly tensioned rather than pulled as tight as possible. Look for a relatively smooth cover without obvious loose sections.
How do you stop a polytunnel cover from flapping?
Make sure the cover is correctly positioned, securely fixed around its perimeter and evenly tensioned. Loose sections should be dealt with during installation rather than simply pulling one isolated area tighter.
Sources
Pennsylvania State University Extension (n.d.) High tunnel structures: The basics. Available at: https://extension.psu.edu/high-tunnel-structures-the-basics (Accessed: 30 September 2026).