When considering adding a polytunnel to your growing space, one of the most important decisions you’ll face is size. Too small, and you may outgrow it quickly. Too large, and it might become costly, underused, or difficult to manage.
This guide walks you through the key considerations in choosing the right size polytunnel for your needs, whether you’re gardening for home use or thinking ahead to commercial production.
What Size Polytunnel Do I Need?
Choosing the right size polytunnel is one of the most important decisions you’ll make when planning your growing space. Whether you’re dreaming of fresh lettuces in January or thinking ahead to supplying salad leaves to a local café, size matters—not only in terms of yield, but in how manageable and versatile your space will be in the long term.
It can be tempting to err on the side of caution and start with something small, particularly if you’re just beginning your gardening journey. But many growers quickly discover that a compact tunnel becomes crowded far sooner than expected—especially once seed trays, staging, and tomato vines begin to take up floor space. On the other hand, an overly large structure can feel daunting and may prove costly to heat, water, or maintain, especially if time is limited.
The best approach is to think holistically. What do you want to grow? How will you use the space, and how might your plans evolve over time? Will your polytunnel be a place of experimentation, a productivity hub, a seasonal retreat—or a mix of all three?
Sizing a garden growing area can be challenging. With a polytunnel garden it is especially important to consider a range of factors when deciding what size of polytunnel to buy.
This guide will help you weigh up all the essential factors: from domestic vs. commercial use to space availability, layout options, and budget constraints. We’ll look at length, width, and height considerations, as well as practical issues like ventilation, light exposure, and access paths. Whether you’ve a compact urban plot or a rural smallholding, matching the size of your tunnel to your real-world needs will ensure it supports your gardening goals both now and into the future.
After all, a well-sized polytunnel isn’t just a structure—it’s a growing environment that should work with you, not against you.
How Will You Use the Polytunnel?
Your intended use is the first and perhaps most vital question. Are you looking to grow food for your household? Experiment with year-round growing? Extend the seasons? Or are you interested in starting a small-scale commercial venture?
Perhaps you plan on using your polytunnel for recreation alone, for storage, for livestock, or for another more unusual purpose. Of course, the intended use will often dictate how large the space needs to be.
How Much Do You Want To Grow?
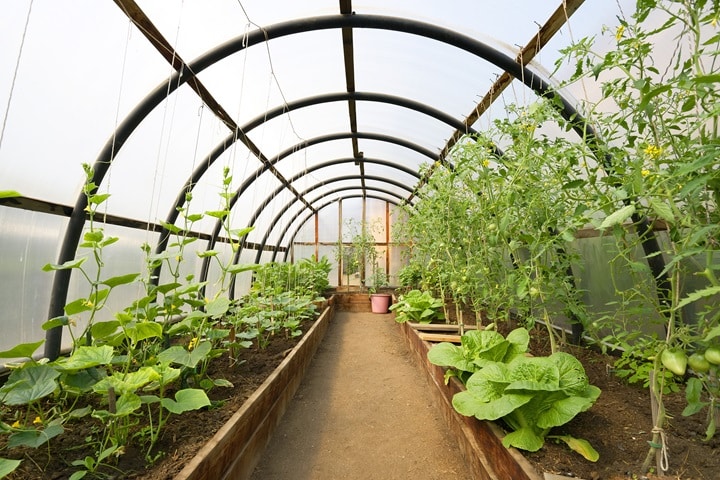
For most people, choosing a polytunnel of the right size involves thinking about how much to grow.
Think practically about the volume of produce you’re hoping for. If you’re a keen grower wanting to be as self-sufficient as possible, you’ll likely need at least 6m x 3m. For a couple or small family aiming for salad, tomatoes, and a few extras, 4m x 2m might suffice.
If you want to grow large crops like tomatoes, aubergines, or courgettes in quantity, or plan to overwinter brassicas or alliums, give yourself more room. Remember: growing vertically (training crops up strings, wires or mesh) is one thing, but it doesn’t replace floor space for crops like potatoes or carrots.
For commercial purposes, especially if selling at markets or to local cafes, a tunnel of 14m+ in length and at least 3-4m wide allows more flexible layout options and crop rotations.
Domestic or Commercial?
Domestic polytunnels can be used usually means growing vegetables, herbs, and perhaps some fruits for your own kitchen. You’ll likely want to include space for seed starting, propagation, or even a little seating area for shelter and observation.
Commercial polytunnels, on the other hand, will demand efficiency, ease of access, and enough room to make your efforts financially worthwhile. Crops need to be planned in succession, and workflow will be a primary concern.
A domestic polytunnel can be modest in scale and often less intensive to set up and manage. Commercial growing, even at a micro level, means thinking about:
- Access for wheelbarrows or trolleys
- Aisle widths for harvesting
- Irrigation systems
- Ventilation and airflow
- Structural durability for high use
If you’re leaning commercial, future-proof your decision by opting for the largest tunnel you can reasonably afford and maintain.
Space Constraints
No matter how ambitious your plans are, your available space will ultimately define what’s possible. Even the most efficient tunnel layout will need room for access, ventilation, and maintenance. Start by measuring your site accurately—length, width, and the slope of the ground. Mark out not just the footprint of the tunnel but also space for paths around the outside so you can walk and work comfortably.
Think about orientation—ideally, your polytunnel should run north to south to maximise light distribution. Also consider obstructions: overhanging trees, fences, neighbouring structures or buildings can all cast unwanted shade, disrupt airflow, or make installation difficult. Likewise, proximity to water and electricity sources (if needed) should be factored in.
If space is limited, consider a narrower tunnel that extends further in length. Even a 2m-wide tunnel can offer great growing potential if carefully planned with vertical systems and intensive planting methods. Urban gardens, allotments, or awkwardly shaped plots can often accommodate longer but narrower structures tucked into underused corners.
Where headroom is an issue—either due to boundary height restrictions or nearby trees—a Gothic-style polytunnel can be a clever alternative, offering more vertical space without dramatically increasing the width.
Remember, choosing a polytunnel that suits your space helps ensure it’s well-used, accessible, and doesn’t overwhelm the rest of your garden. It’s about fitting the structure harmoniously into your wider growing plans.
Polytunnel Length Guidance
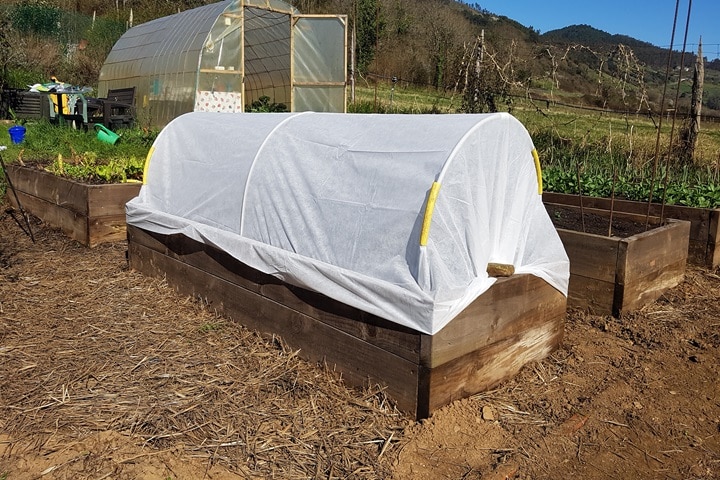
Polytunnels generally come in standardised lengths—common sizes include 4m, 6m, 8m, 10m, 12m, 14m, and longer.
- 4-6m: Ideal for small gardens, first-time growers, or space-constrained urban areas.
- 6-10m: Great for a family’s year-round produce. Allows staggered planting and simple crop rotation.
- 12m+: Better for larger families, community gardens, or commercial growing.
The advantage of length is it offers flexibility—both in layout and planting schedule. Longer tunnels give you room to sow and harvest in succession without disturbing neighbouring crops.
Polytunnel Width Guidance
Width determines how much growing space you’ll have across the tunnel and how easily you can move around.
- 2-2.5m wide: Suitable for narrow spaces and single beds with limited paths. Good for beginners.
- 3-4m wide: Offers space for 2 or 3 growing beds with paths between. Comfortable access, and workable for most domestic growers.
- 5m+ wide: For larger-scale growing, with multiple beds, wider access paths, and possible equipment use.
If you have the space, width increases usability far more than length—a 6m x 3m tunnel is often more practical than a 10m x 2m one.
Polytunnel Height Guidance
Most polytunnels have a central height of 2m to 2.5m, though taller options are available. Height allows:
- Comfortable standing and movement
- Vertical growing (e.g., tomatoes, beans, cucumbers)
- Better air circulation
If you’re tall or plan to install shelving or hanging systems, go for a tunnel with a generous centre height.
Available Budget
Budget often drives decisions, but it’s wise not to skimp. A well-made, UV-resistant tunnel with galvanised steel hoops will outlast flimsier models, saving money long-term. Buying once and buying better can be the most sustainable choice.
Time… And Watering!
Before buying, ask yourself honestly: how much time do you have to tend your tunnel? A larger space needs more planting, watering, weeding, and monitoring. Time-rich gardeners might relish it; others may find themselves overwhelmed.
Consider installing automatic water irrigation systems or gravity-fed systems from water butts to make watering more manageable. Also bear in mind that mini polytunnels can overheat quickly in summer, requiring regular venting or shade management.
Other Information for Buyers:
Do I Need Planning Permission For My Polytunnel?
In most UK domestic settings, planning permission is not required for polytunnels used for private gardening. However, if your property is listed, in a conservation area, or you plan to build very large or multiple structures, it’s wise to consult your local planning authority.
For commercial use on agricultural land, permission might be needed depending on size and permanence.
Can I Build A Polytunnel On A Slope?
Yes, but it requires extra planning. On gentle slopes, you can usually level the ground with minor work. For steeper gradients, consider terracing, or aligning the tunnel along the slope to reduce runoff and soil erosion.
Drainage becomes more important here. Raised beds or French drains can help control water movement.
What Is The Best Base For A Polytunnel?
Polytunnels can be installed directly on soil, which is ideal for in-ground growing. Make sure the soil is level and well-draining. It is also possible to place a polytunnel over an existing area of grass,or lawn. Grass can be smothered with cardboard and organic matter in a sheet mulching approach to prepare the growing areas for planting.
You can also install a polytunnel on concrete, or hard standing, providing that you have considered drainage and used the right building methods and installation techniques.
How Do I Maximise Light Exposure In My Polytunnel?
- Site orientation: In most of the UK, a north-south orientation gives the best even light distribution.
- Keep covers clean: Wash poly covers a few times a year.
- Avoid shade: Position away from tall trees, buildings, or fences.
How To Layout My Polytunnel?
Plan your layout based on:
- Main crops: Taller crops to the north or centre
- Paths: Leave 30-50cm walkways between beds
- Water access: Place water barrels centrally or at one end
- Companion planting: Interplant fast and slow growers
- Vertical structures: Trellis for beans, wires for tomatoes
Leave space to move easily and keep airflow high to reduce pests and disease.
Considering the best layout can also help you to determine the best dimensions for your polytunnel.
FAQs
Is a bigger polytunnel more efficient for growing?
Yes, often it is. Larger tunnels buffer temperature swings better, offer more growing options, and reduce the impact of edge effects (like frost pockets or overheating). They allow better crop rotation and may prove more efficient in water and labour over time. That said, only choose what you can reasonably manage and keep productive.
What’s the difference between width and length when choosing a tunnel?
Width affects layout and access; it determines how many beds you can have side by side. Length gives you more room for succession sowing, spacing, and rotation. If space allows, a wider tunnel is often more useful than simply going longer, especially for ventilation and workflow.
Sources
Embracing Harvest. (2020) How big should your garden be? Garden Size / Time / Lifestyle. [online] Available at: https://embracingharvest.com/garden-size-time-lifestyle/