Learning how to clean your polytunnel is important – it lets in more light, protects your crops, and extends the life of the cover. Neglect this job and you will likely be disappointed by the timeline of the cover, you will get less sunlight, and your harvests may be lacklustre too.
If you have gardened with a polytunnel for more than a season, you will know how quickly dirt, algae, hard-water marks, and general grime can build up. Even a thin layer of dust can reduce light levels significantly, especially during the darker months when every ray counts.
I’ve had my polytunnel for over ten years now, and I’ve learned the best strategies to keep it clean, inside and out. In this guide, you will learn how to remove algae, clean internal surfaces, choose safe clearning, and maintain your tunnel throughout the year.
Key Points:
- A clean polytunnel increases light levels and improves plant growth throughout the year.
- Dirt, algae, and debris build up quickly and can reduce sunlight by a significant margin.
- Cleaning the cover is simple with the right tools, a safe detergent, and a structured approach.
- Regular cleaning prevents long-term wear and helps you spot small issues before they become damage.
- Using purpose-made cleaners and repair products protects the cover for longer, including applying polythene repair tape when needed.
- Why Cleaning Your Polytunnel Matters
- How to Clean Your Polytunnel Cover: Step-by-Step Guide (Outside)
- How to Clean the Inside of Your Polytunnel
- How to Clean Algae and Dirt Off Your Polytunnel
- Polytunnel Cleaning Chemicals (What’s Safe & What Isn’t)
- DIY Natural Cleaners for Your Polytunnel
- Polytunnel Maintenance Tips:
- Check for Tears and Repair Immediately
- Regularly Wash Down Door Frames & Hoops
- Improve Ground Hygiene
- Seasonal Deep Cleans
- When Is the Best Time to Clean Your Polytunnel?
- Common Cleaning Mistakes to Avoid
- Keeping Your Polytunnel Clean Year-Round
Why Cleaning Your Polytunnel Matters
A polytunnel is a hardworking part of your garden ecosystem, and like any tool, it performs at its best when it is cared for properly. Soil splashes, algae, bird droppings, dust, and general grime all accumulate on the cover. Over time this reduces light levels, increases humidity, encourages pests, and shortens the life of the polythene.
Maximise Light Transmission
Light is energy. Any dirt on your cover reduces the sunlight reaching your crops. Research suggests that dirty covers can lose up to 10–20% of light transmission compared to clean polythene, sometimes more in winter when algae spreads quickly.
Cleaning your tunnel before the darker months of late autumn or before early-spring sowing can make a dramatic difference to productivity. Seedlings are stronger, fruits ripen earlier, and foliage grows more vigorously when the cover is clean.
Boost Durability and Prevent Damage
Dirt and algae aren’t just cosmetic issues, they hold moisture against the polythene. Over time this increases the risk of brittleness, weakening, and small tears. A regular clean gives you the chance to check the cover closely. If you spot a tiny hole or scrape, fixing it immediately with polythene repair tape prevents the damage from spreading.
Reduce Disease and Pest Risks
Dirty surfaces trap moisture, increasing humidity and encouraging fungal spores to settle. Inside the tunnel, condensation can drip from the polythene, carrying pathogens onto plants below. Cleaning eliminates residue where pests overwinter and where moulds, algae, and bacteria thrive.
- Dirty covers can reduce light transmission significantly, and even a 1% reduction in light can lead to a 1% reduction in crop yield.
- Clean before winter or early spring for maximum benefit.
- North-facing sides of tunnels typically develop algae fastest.
How to Clean Your Polytunnel Cover: Step-by-Step Guide (Outside)
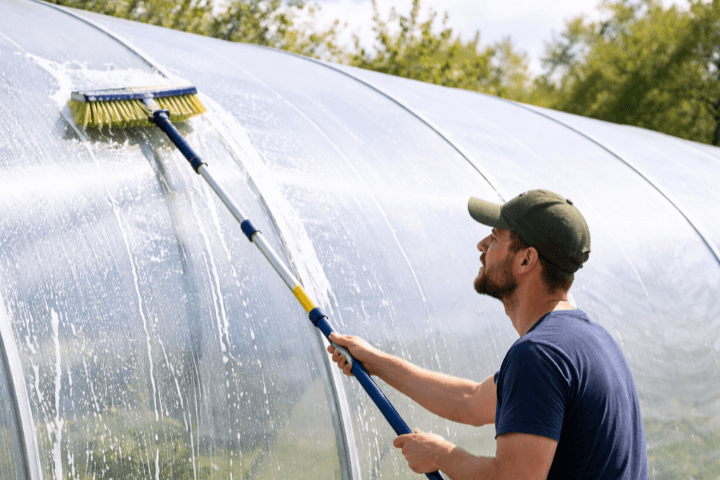
Cleaning the exterior is surprisingly easy when you follow a simple, gardeners-tested process.
What You’ll Need
- Long-handled soft brush or soft broom
- Soft cloths or an old sheet
- Bucket and access to clean water
- Hose or watering can with a gentle rose
- A safe, polythene-friendly cleaning product such as Algon or a DIY cleaning solution.
- Optional: a mild disinfectant specifically made for polytunnel cleaning
Avoid abrasive brushes, harsh detergents, or pressure washers—they can damage the polythene.
Step 1: Clear the Deck
Before you begin, tidy the area around the polytunnel. Remove pots, tools, and any plants leaning against the cover. This gives you safe access and reduces the chance of dragging soil onto freshly cleaned areas.
Step 2: Rinse Thoroughly
Use a hose or a watering can with a rose to gently wet the entire exterior. This removes loose dust and softens stubborn dirt. Don’t use a pressure washer. The force can damage or stretch the cover.
Step 3: Prepare the Cleaning Solution
Mix clean water with a polythene-safe product, which is gentle, biodegradable, and specifically designed for clearing algae and dirt without damaging the cover.
You can purchase specific products or make your own natural cleaners, but the important thing is to avoid household detergents, bleach, or solvents. These can break down the plasticisers in polythene and shorten the lifespan of your tunnel.
Step 4: Lay a Cleaning Sheet Over the Polytunnel
A brilliant low-tech technique is to soak a soft cloth or old sheet in your cleaning solution and lay it over the tunnel. The weight of the wet fabric ensures safe contact with the polythene without abrasion.
This allows the solution to sit and lift dirt without scrubbing.
Step 5: Pull the Sheet Back and Forth
With two people, gently pull the sheet across the surface in a slow back-and-forth motion. This loosens dirt and algae without applying excessive pressure.
Work from the top down so dirty water doesn’t streak onto clean areas.
Step 6: Clean the Sides
Side panels gather the most soil splashes and algae. Use your soft brush to gently loosen harder-to-reach dirt, particularly on the northern side where algae often thrives.
Step 7: Rinse if Needed
Rinse away any cleaning residue with clean water. Allow the cover to dry naturally.
How to Clean the Inside of Your Polytunnel
The inside is often overlooked, yet it is just as important as the exterior. Dust, condensation, mould and even insect eggs accumulate on hoops, frames, and inner surfaces.
- Create space. Move pots and trays aside to give yourself clear access.
- Clean support hoops and frames. Wipe down metal hoops, doors, and end frames—these areas collect condensation and algae.
- Disinfect surfaces. Benches, staging, trays, and tools are hotspots for pests and mould.
- Wash the interior polythene. Use the same gentle polytunnel cleaning products as outside. Harsh chemicals can release fumes or damage crops. Wipe in circular motions with a soft cloth.
High-Risk Areas for Mould and Pests
- Lower interior edges where condensation gathers
- Door frames and vents
- Under staging or benches
- Drip lines above tall crops
- Any shaded interior corner
How to Clean Algae and Dirt Off Your Polytunnel
Algae thrives in damp, shaded conditions—especially on the north-facing side of the tunnel. Although it’s natural, letting it build up can block light, increase humidity, and reduce cover lifespan.
Tools for algae removal:
- Soft brush
- Warm water
- Algon or another cleaner suitable for for gentle, organic cleaning
Why Not Use Harsh Chemicals?
Solvents and strong detergents degrade polythene by breaking down its UV stabilisers. This causes brittleness and yellowing.
For Stubborn Dirt
Use warm water and a soft circular motion. Never use abrasive pads.
Polytunnel Cleaning Chemicals (What’s Safe & What Isn’t)
A few simple rules will protect your tunnel:
Avoid
- Bleach
- Disinfectants not labelled for use on polythene
- Solvents (white spirit, acetone, etc.)
- Abrasive powders or scouring pads
Safe Options
- pH-neutral cleaners
- Specialist polythene cleaning products
- Organic products, ideal for organic gardeners – purchase or make your own.
- Warm water + mild biodegradable soap (if needed)
DIY Natural Cleaners for Your Polytunnel
If you prefer to avoid harsh chemicals in your growing space, there are several natural, polythene-safe cleaning options you can make at home. These gentle DIY solutions help remove dirt, light algae, and general grime without damaging the cover or leaving residues that could affect your crops.
One of the simplest options is warm water with a splash of natural liquid soap. Choose a mild, biodegradable soap and mix one teaspoon into a bucket of warm water. This is ideal for routine wipe-downs, especially inside the tunnel where ventilation is limited.
For algae-prone areas, a vinegar solution works well: mix one part white vinegar with three parts warm water. Apply it with a soft cloth, let it sit for a few minutes, and wipe away gently. Vinegar helps break down mineral deposits and early algae growth, though from experience I would say that it can struggle with thick, established patches.
You can also create a citrus-infused cleaner by soaking lemon or orange peels in vinegar for one to two weeks. Strain, dilute with warm water, and use it for refreshing interior surfaces
Polytunnel Maintenance Tips:
Keeping the tunnel clean goes hand-in-hand with overall maintenance.
Check for Tears and Repair Immediately
Small holes can quickly enlarge in windy weather. Applying polythene repair tape keeps the cover airtight and extends its life.
Regularly Wash Down Door Frames & Hoops
Dirt and algae accumulate on the metal structures as much as on the polythene. Keeping them clean prevents rust and improves hygiene.
Improve Ground Hygiene
Weeds, old plant matter, and spilled soil harbour pests and diseases. Keep your pathways clear and consider using weed membranes where appropriate.
Seasonal Deep Cleans
A deep clean twice a year, spring and autumn, is ideal. After a severe storm or signs of heavy green algae, give the tunnel an additional wash.
Annual Polytunnel Maintenance Checklist
- Spring clean (full wash)
- Autumn clean (post-harvest)
- Monthly algae checks
- Ventilation adjustments for humidity control
- Immediate repair of small tears
- Keep gutters and drainage clear
When Is the Best Time to Clean Your Polytunnel?
The ideal times to clean your polytunnel are early spring, before sowing and planting and autumn, after clearing beds at the end of the season. Choose a warm but cloudy day. Bright sunshine dries detergent too quickly and can leave streaks.
Common Cleaning Mistakes to Avoid
- Using abrasive brushes that scratch the polythene
- Cleaning in direct, hot sun
- Using household detergents, bleach, or solvents
- Forgetting to clean gutters, door frames, and the inside cover
- Leaving algae to thicken until it becomes difficult to remove
Keeping Your Polytunnel Clean Year-Round
A clean tunnel is easier to maintain than one left for several seasons. Light regular care prevents grime from building up.
- Wipe down internal surfaces monthly
- Check algae-prone spots every few weeks
- Keep paths clear and weed-free
- Vent regularly to control humidity and reduce condensation
- Use a gentle cleaner when algae first appears rather than letting it take hold
Cleaning your polytunnel may not be the most glamorous gardening job, but it’s one with a huge payoff. More light means stronger plants, earlier harvests, and better yields. Clean surfaces mean fewer pests and diseases. And regular care extends the life of your cover. This will save you money in the long term.
With the right tools, gentle cleaning products, and a steady routine, the process becomes simple, satisfying, and well worth the effort. A clean polytunnel is a bright, productive, and joyful space to grow in throughout every season.
FAQs
What should I use to clean a polytunnel?
To clean a polytunnel, use a specialist polythene-safe cleaner such as Algon, warm water, and a soft brush or cloth.
What is the best thing to clean a greenhouse with?
The best thing to clean a greenhouse with is a pH-neutral, non-abrasive cleaners. Avoid bleach and solvents for plastic or polythene structures.
How do I clean green algae off plastic?
To clean algae off plastic, use warm water, a soft brush, and a gentle cleaner like Algon.
Does washing-up liquid remove algae?
Washing-up liquid can remove algae, but it may leave residues and isn’t always ideal for polythene. Purpose-made cleaners are safer.
How do I remove algae without scrubbing?
To remove algae without scrubbing, apply Algon and allow it to break down algae naturally over time.
How long does a polytunnel last?
With good maintenance and regular cleaning, a polytunnel can last 7 to 10 years or more, when using a high-quality polythene cover.
Sources
Hemming, S. et al. (2012) Quantification of effects of light reduction in greenhouses on yield. [online] Available at: https://www.researchgate.net/publication/290234075_Quantification_of_effects_of_light_reduction_in_greenhouses_on_yield