


Do you have a passion for beer and other alcoholic beverages? Maybe growing hops at home can be the rewarding venture that you need to make your own beer. In this article, we will cover everything you need to know about hops growing, from planting and training to harvesting and storing. Discover how to grow hops in your garden, choose the best varieties, and optimise your crops for the best hops!
Key Info:
- Botanical Name: Humulus lupulus
- Plant Type: Trees, Shrubs, and Vine
- Sun Exposure: Full Sun
- Soil pH: Neutral
- Bloom Period: Summer
- Flower Colour: Green-Yellow
- Hardiness Zone: 4-9
Interesting Facts:
- Hops have a soporific effect, and their flowers have long been used in dream pillows to induce sleep.
- Hop bines can grow up to 12 inches a day and always twist in a clockwise direction.
- Each hop cone consists of about 60 individual flowers surrounded by bracts, and a single hop plant can survive up to 50 years in the wild.
Growing organically is not as straightforward as you think; learn about our recommended organic gardening tips.
Planting
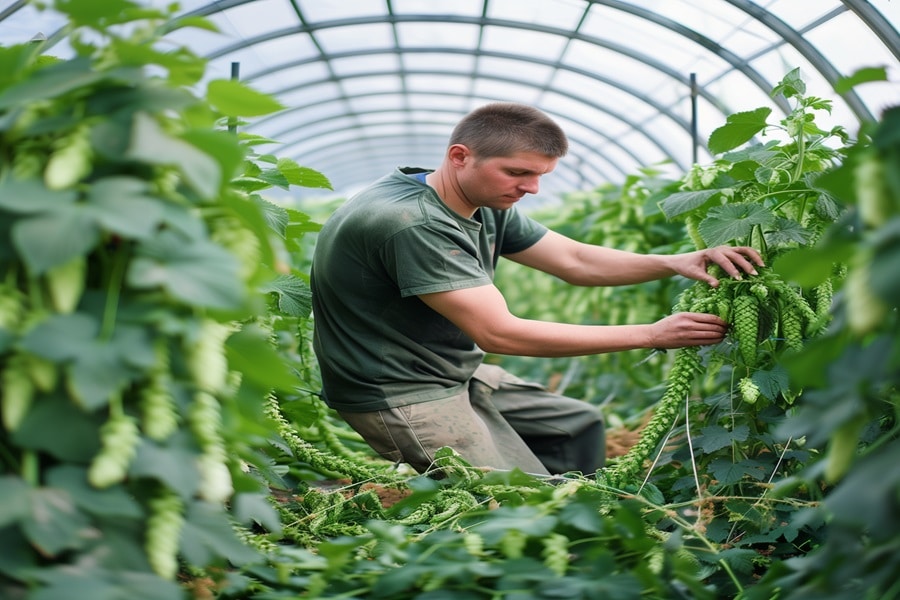
In this section, we will cover when to plant hops, choosing and preparing the planting site, as well as how to plant them.
When to Plant Hops
Begin planting hops in spring after the last frost has passed. Hops need at least 120 frost-free days to fully develop and produce a good crop.
During the first year, focus on root development as the plant will produce few flowers.
By the second year, expect a full crop.
Choosing and Preparing a Planting Site
Hops thrive with a sturdy trellis system for their bines, which can grow over 25 feet long and weigh more than 20 pounds. The soil should be loose and well-draining to prevent waterlogged roots. Improve the soil with aged manure or compost to provide necessary nutrients.
How to Plant Hops
Hops are typically grown from root cuttings or rhizomes rather than seeds to preserve their desired characteristics. In a home garden, plant hops in hills spaced at least 3 feet apart. Dig a hole twice as wide and deep as the rhizome, place it with buds facing up, and cover with soil. Water thoroughly and mulch lightly to keep weeds at bay.
Are you a bit of a beginner with your garden? Try these essential gardening tips.
How to Grow Hops
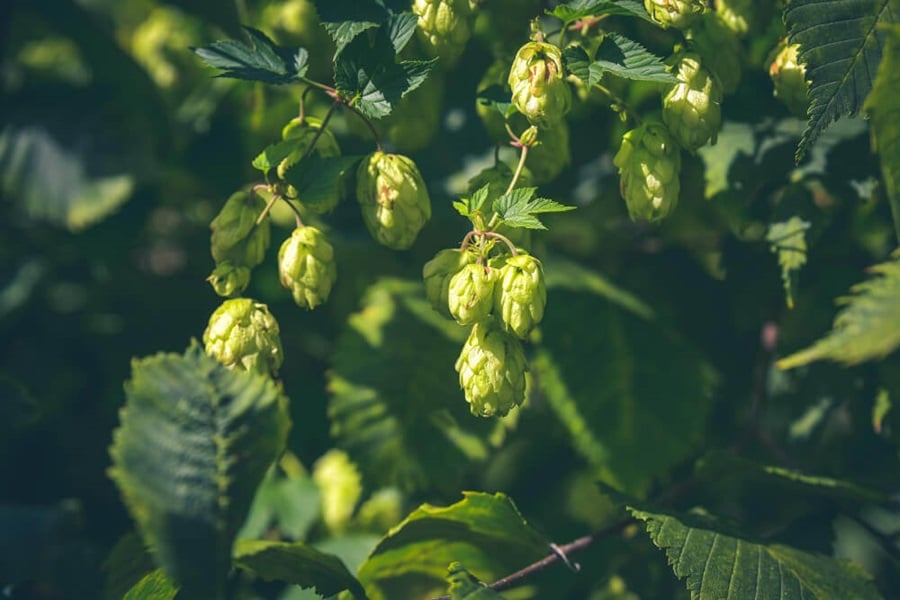
How to Grow Hops
In the first year of growing hops, provide frequent, light watering to help the plants establish their root systems. Mature plants also need regular watering, especially in dry conditions, but be careful not to waterlog the soil. Well-draining soil is essential to prevent root rot.
Focus on allowing the plants to develop their root systems in the first year. Avoid pruning or removing any foliage or bines. Once the plants are established, select 2 to 6 bines from each hill and train them up a support. You can prune off unused bines or plant them to produce new rhizomes.
Train the bines to climb a trellis or other support system. Hops naturally twine clockwise, so ensure you wrap them correctly around twine or wire staked in the ground and attached to a building, fence, or another support. Support the lateral branches to prevent tangling, as most flower cones are produced on the upper parts of these branches and will be ready for harvesting in late summer.
How to Propagate Hops
At the end of the season, bury a few healthy bottom bines in the soil for propagating new plants the following spring. Dig a shallow trench, bury the bines, and mark their location. In spring, dig up the bines and cut them into pieces about 4 inches long, ensuring each cutting has an eye or bud. Plant these cuttings in hills.
Recommended Varieties
- Willamette: Vigorous bines yielding small to medium-sized cones with fruity aromatic notes.
- Nugget: Pale greenish-yellow flowers in late summer, winter hardy to Zone 2, with a strong herbal aroma.
- Centennial: Classic hop with citrus tones and clean floral taste, used in pale ales and IPAs, with medium-sized green cones harvested in August.
- Cascade: Thrives in hot southern regions, fast-growing with medium-sized green cones and unique floral, spicy, and citrus character.
When to Harvest Hops
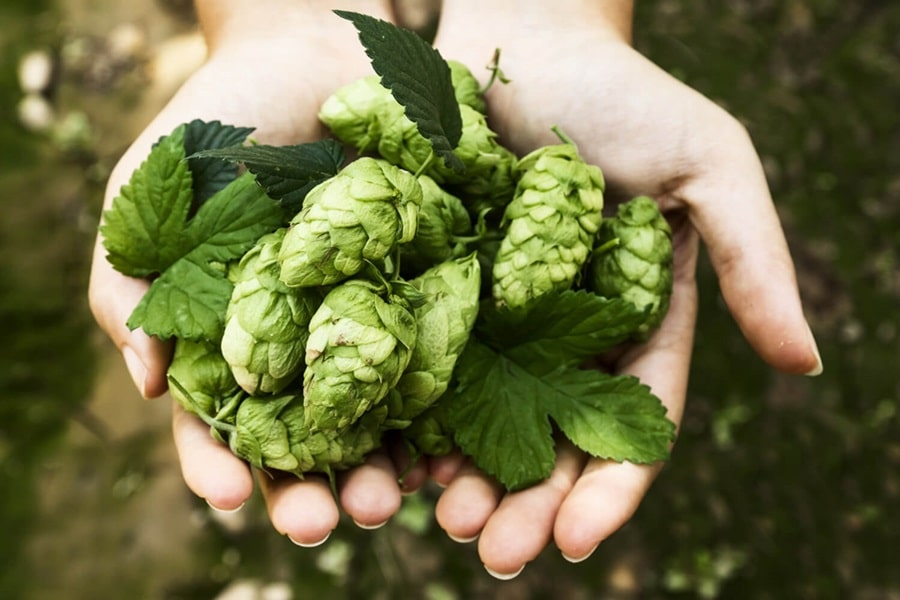
Harvest hops at the end of the growing season, typically in late summer.
Look for these signs of hop cone maturity:
- Papery Texture and Visible Lupulin: The hop cones should feel papery and dry with visible yellow lupulin inside. This is when you can gently hand-pick them.
- Light, Springy Cone: Squeeze the cones gently; they should be light and springy. Use scissors for careful snipping.
- Aroma at Peak Intensity: The cones will emit a strong, aromatic scent when they are ready for harvesting. Selectively harvest the prime cones to ensure the best quality.
As you pick the cones at various stages, each brings unique flavours and aromas to your home brewed ale.
Harvest Technique
To harvest hops, squeeze the flower cones to see if they have started to dry out. Let the bines dry on the support system or cut them down and lay them on the ground to dry before pulling off the cones. Finish drying the cones on screens in the sun or in a well-ventilated room.
For more harvesting information, read our guide on when is harvest season in the UK.
How to Store Hops
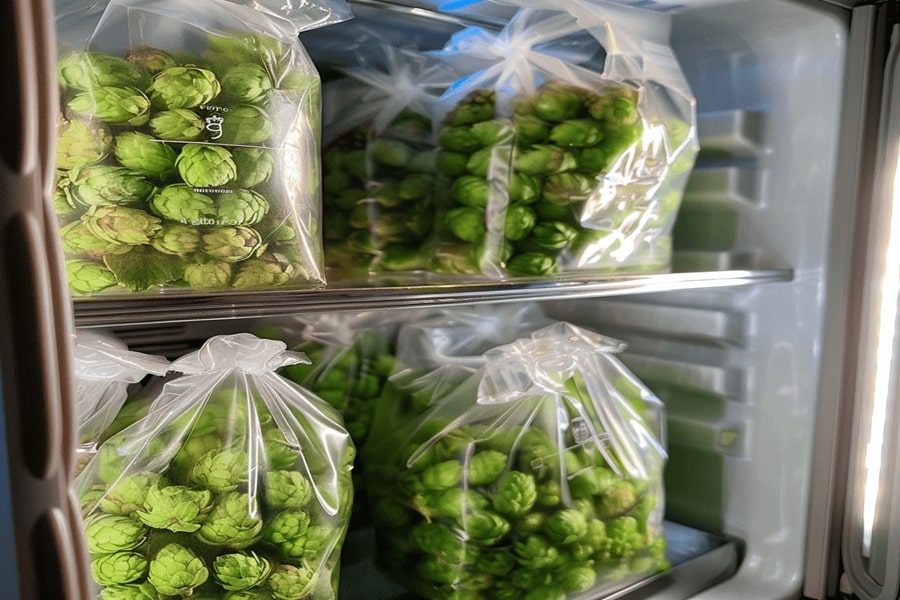
For the freshest flavour, store the dried cones in airtight containers or vacuum-sealed bags in the freezer or refrigerator until ready to use. After harvesting, dry the hops thoroughly. This can take one to two weeks in a warm, dry spot out of direct sunlight. Some suggest using a fan on a low heat setting to assist in the drying process. Once completely dry, place the cones in zip-lock airtight bags and store them in the freezer.
Long-Term Storage Solutions for Home-Grown Hops
Once the hops have dried, invest in a vacuum sealer to remove air and lock in freshness. Store vacuum-sealed hops in the freezer to maintain their quality until use. Label bags with dates and variety for easy identification during brewing. These packets, stored in the freezer, preserve the hops’ flavours and aromas until they are ready to be brewed into a delightful pint.
Pruning and Managing Bull Shoots
Each season begins with the emergence of bull shoots, the first green shoots to rise from the soil. Pruning these shoots is essential as they can compromise the plant’s productivity. Identify bull shoots by their colour and snap tendency and prune them early to redirect the plant’s energy into more productive shoots.
Regular Pruning
Regular pruning stimulates the growth of healthier bines and higher cone yields. Consistently check for and manage new bull shoots throughout the initial growth phase.
Pests and Diseases
When growing hops at home, be aware of common pests and diseases that can affect your plants. Some of the most prevalent issues include:
- Aphids: These small insects can cause significant damage by sucking sap from the plants.
- Spider Mites: Tiny arachnids that feed on hop leaves, leading to discoloration and reduced plant vigour.
- Cutworms: Caterpillars that cut down young plants at the soil level.
- Downy Mildew: A fungal disease that causes yellow spots on leaves and can severely impact plant health.
- Verticillium Wilt: Another fungal disease that causes wilting and yellowing of leaves, leading to plant decline.
- Viruses: Viruses can cause tip dieback, yellow spots, stunted growth, and failure to climb. Affected plants should be removed and destroyed. Purchasing rootstock from a reliable source reduces the risk of virus problems.
Make sure to keep your gardens and polytunnels slug free by learning about what eats slugs.
Cooking Notes
Young hop shoots in the spring are a culinary delight. They can be sautéed or pickled, similar to asparagus shoots. Their unique flavour adds a gourmet touch to various dishes, making them a versatile addition to your kitchen.
Hop Uses
While growing hops can be challenging, their uses make it worthwhile. Hops are essential in brewing beer, providing bitterness that balances the sweetness from malt and acting as a natural preservative due to their antibacterial properties. Dried hops are also used in certain types of medicine, showcasing their versatility beyond brewing.
Are Hops Easy to Grow in the UK?
Hops can thrive in UK gardens despite the unpredictable weather. While growing hops requires attention to detail and continuous care, it is manageable and rewarding for those passionate about hops growing at home.
Growing Hops At Home

Overall, growing hops at home can be rewarding when combined with your own home brews. By understanding how to plant, grow, and harvest hops, you can ensure a successful crop. Pay attention to pests and diseases, and explore the culinary uses of young shoots. Despite the UK’s unpredictable weather, hops can thrive with proper care. With dedication and the right techniques, you’ll enjoy a bountiful harvest and the satisfaction of brewing your own beer.
Check out these vast amounts of delicious beer recipes that you can use your homegrown hops for.
FAQs
How easy is it to grow hops?
Growing hops is moderately easy as they are hardy plants, but they do require specific conditions and care, such as full sun, ample water, and strong support structures for climbing.
Where do hops grow best?
Hops grow best in temperate climates with full sun exposure. They thrive in well-drained, sandy loam soil with a pH between 6.0 and 7.5 and need a good amount of water and nutrients.
Sources
BBC Good Food. (2021) Beer Recipes. [online] Available at: https://www.bbcgoodfood.com/recipes/collection/beer-recipes [accessed 15/05/24]






