


Ever wondered how to make a cold frame or what a DIY cold frame is?
Cold frames are great for starting seedlings in the spring seasons, assisting vegetable cropping into the winter season, and hardening off tender and delicate plants, like chilies, in the wee months of summer. In this article, you will learn how to make a DIY cold frame as it is a very cost-effective solution compared to buying them from a shop.
DIY Cold Frame: The Building Materials and Tools You’ll Need

The Lid
- The lid of your DIY cold frame can be made from an old window or windows not needed for a clear door – a shower door, for example.
- If you can’t salvage one or having difficulty acquiring one due to any reason, you can use a glass sheet or even twinwall polycarbonate to secure it to any basic wooden frame.
- Now, to fix the lid to your frame, find a few robust hinges, along with some handles if you wish to add those.
The Frame
- We need to make a box for the lid to sit on. Find some pressure-treated lumber and cut it in lengths to match the dimensions of your lids or lid. While building a cold frame, ensure that the back is at least one board higher than the front. We need to give it a slope so that rainwater can trickle down easily, thus, maximising the amount of light your plants are exposed to inside.
- For the particular DIY cold frame that we’re building in this guide, we will be using three boards for the front and four for the back. Seven shorter boards will make up the sides while the seventh length will be diagonally cut in half so that we have two triangular boards looking identical. This will come in handy for both sides to match the slope.
- We will screw all our boards to four vertical corner posts but in a way that matches the height of both the front and back boards. You must also grab a hold of two battens of varying lengths as this will let you open the lid easily on those bright and sunny days.
The Tools
- Building a cold frame requires nothing more than a drill, a screwdriver, and a couple of wood screws. That’s it, you’re all set!
Additional read: How to build a garden wall
Assembly Instructions: Cold Frame DIY Made Easy!

- Start by screwing the side boards to their respective corner posts. Use two screws on both sides of each board.
- You’ll discover that drilling pilot holes prior to securely fastening the boards makes the process simpler.
- Next, screw the front and back boards into their corner posts, just like you did in the step above.
- Your DIY cold frame is ready for the lid(s). Gently place the lid onto the frame so it sits almost perfectly with the back frame. Screw on your hinges. For longer lids, you might require multiple hinges along their length.
- The final step is to screw the lid supports into their place. You’d want to position these on your cold frame’s inside – a short one on the front and a longer one on the side. However, leave them just loose enough for the lid to be swiveled up with ease; this will also allow you to prop it open at varying heights, depending on how much air you want to let in.
- Attach some handles to the lid for easier opening.
- And – we’re done!
How can I use a DIY cold frame for gardening?
One of the things a cold frame (DIY or otherwise) is great for is growing hardy salads throughout the winter months, or even to get a head start before the polytunnel growing season arrives.
Strawberries, for example, when grown in a cold frame, will be ready for picking a good two weeks ahead, compared to those grown normally outside. You can also use cold frames to start off tender crops like squash.
Some people even use their frame as a ‘halfway house’ between their house/greenhouse and garden, so that they can harden off plants before planting them out.
6 Cold frame plans for a winter garden
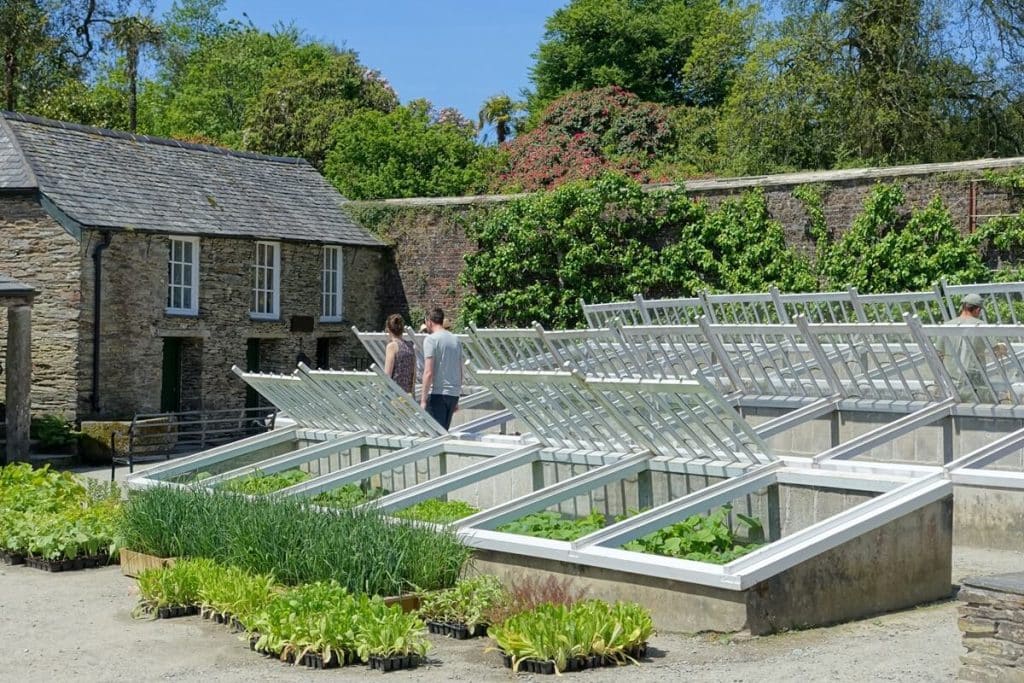
With cold weather approaching fast, most of us can’t wait for it to pass, so that spring can arrive and bring with it a fresh supply of our favourite fruits and vegetables.
Well, there’s a way to bring that lovely produce on our table earlier by building different kinds of DIY cold frames:
1. Simple Cold Frame (aka. soft plastic or plastic sheeting frame)
While this cold frame DIY isn’t very elaborate compared to the others, it actually works very well. Made from poly and plywood sheeting, the sloped shape provides optimal rain drainage while the cold frame crops stay nice and warm in the cooler months.
You’ll need:
- Some bolts, nuts or screws along with poly sheeting, plywood, and miscellaneous tools.
- Dimensions: sloped top peaks 4’ wide x 4’ deep standing 15” tall.
- Difficulty: Beginner-Intermediate
2. PVC Cold Frame
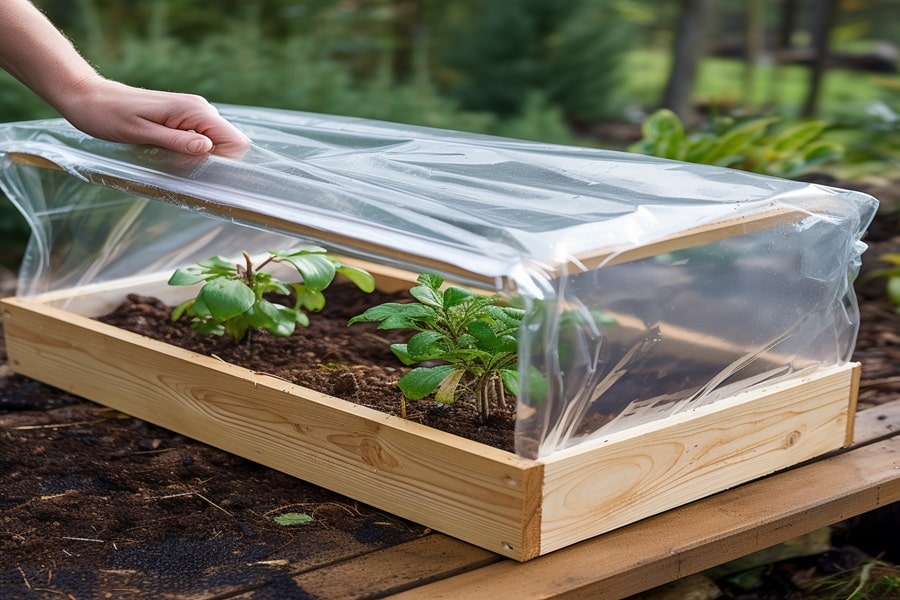
A PVC cold frame can be constructed out of PVC and plastic sheeting entirely. It’s a basic frame that retains a lot of the warmth and allows easy access, thanks to its triangular roof with a hinge. You can replace your plastic sheeting each year as you deem fit, which you will be doing once you practice cold frame gardening on a regular basis.
You’ll need:
- 6mm clear plastic sheeting, pipe glue, a PVC pipe and PCV connectors.
- Dimensions: 4’ wide x 2’ 4” deep.
- Difficulty: Beginner
3. Cold Frame Tent
This one is perfect if you already have raised beds. All you need now is a top part or frame to rest on top of those lovely beds. But if you don’t, you can still add a box around your garden plot. It’s so easy to set up that after a few moments of constructing, you’ll be able to endure the weather while still growing your plants to an impressive height.
You’ll need:
- Some screws or nails along with a hardwood dowel, lumbar, and heavy plastic sheeting.
- Dimensions: These will vary depending on your personal requirements.
- Difficulty: Beginner-intermediate
4. A sleek and efficient cold frame
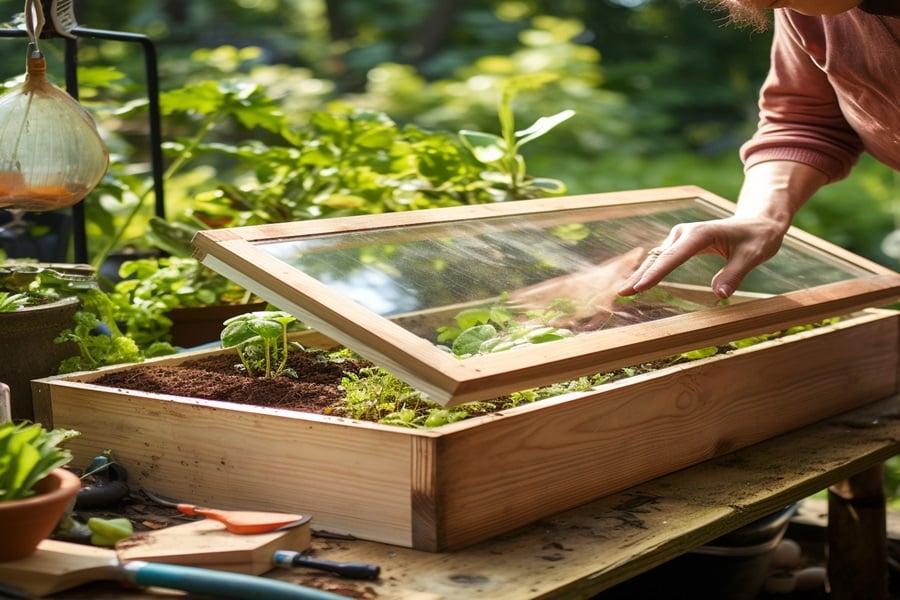
This type of DIY cold frame is meant to be constructed on top of an existing raised bed only. While you can certainly customise the design slightly to allow runoff from rains to move about more easily, it is a fantastic option for working in cold but not-so-heavy rainy environments with its current design.
You’ll need:
- Screws or nails, heavy plastic sheeting, and lumber.
- Dimensions: 4’ wide x 8’ deep x 15” tall.
- Difficulty: Beginner
5. Hoop House PVC cold frame
This is, again, not a very elaborate cold frame DIY, but it will do the trick rather nicely!
It’s made to fit only the inside walls of a raised bed. The two plywood ends will keep the wind out of the tunnel while the overtop made from plastic sheeting will allow more than adequate light to bathe your plants.
So, what we’re looking at is basically a mini-greenhouse of sorts, making winter gardening convenient and fun. Miniature polytunnels are a great way to start your crop growing journey.
Related: How to build a green roof on a shed
You’ll need:
- Miscellaneous screws and other assorted equipment, plus 2×3 studs, plywood, plastic sheeting, and a PVC material.
- Dimensions are variable and can be easily adjusted to accommodate the majority of raised beds.
- Difficulty: Beginner-intermediate
6. Cold frame from plastic bottle
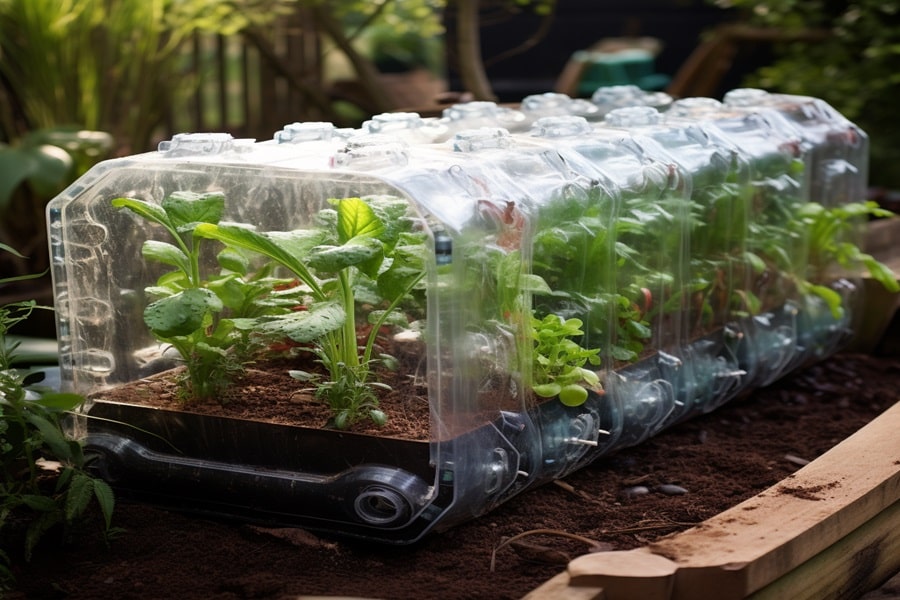
In case you have a problem with plastic bottles taking up too much space in one of your cupboards or recycling bin, then don’t throw them away just yet!
Take some of the empty bottles and add a little silicone caulk between them. It’s up to you whether you want to leave a few gaps for ventilation or make it fully enclosed.
No matter what you choose, this fun recycling project will make the most of those empty bottles.
You’ll need:
- Some empty plastic bottles, lumber, wood doweling or slats, nails and screws, and the silicone caulk is optional.
- Dimensions: These can vary depending on the size you want.
- Difficult: Beginner-intermediate
Make A Cold Frame With Ease
No matter which cold frame DIY you end up choosing, it’s important to enjoy what you’re doing. A DIY cold frame is a great way to prolong your growing season and also pick your produce earlier than others.
As you can see, there are many materials and supplies which you can easily find if you want to make a cold frame at home. The only limiting factor is your own imagination.
For more ways on doing DIY recycling in your garden, try out this guide on reusing Christmas waste in the backyard.
FAQs
What can I use instead of a cold frame?
You can use a greenhouse, cloche, hoop house, or grow tunnel as alternatives to a cold frame.
Can I use plastic sheeting for a cold frame?
Yes, plastic sheeting can be used as a cover for a cold frame, especially clear polyethylene.
What kind of wood should I use for a cold frame?
Use rot-resistant wood like cedar, redwood, or pressure-treated lumber for a cold frame.
What is the best material for a cold frame?
The best materials are those that balance durability and light transmission, such as polycarbonate panels or glass for the lid, and rot-resistant wood or recycled materials for the frame.
Sources
Conway, T., (2024) 8 sustainable ways to reuse Christmas waste in your backyard – instead of throwing it out. Homes and Gardens. [online] Available at: https://www.homesandgardens.com/gardens/reuse-christmas-waste-in-the-backyard [accessed 25/01/24]






