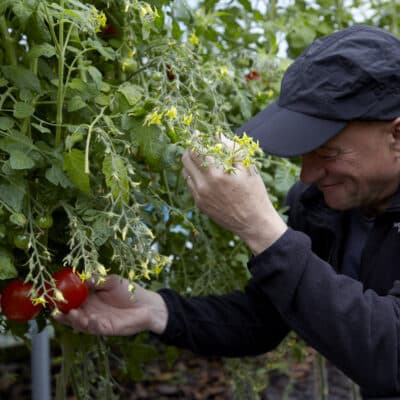
Hydroponic farming is an innovative and sustainable method of growing plants without soil. Instead, plants grow in a nutrient-rich solution, making it an excellent choice for space-efficient gardens, especially in polytunnels where temperature, humidity, and light can be controlled.
A vertical hydroponic tower is a highly efficient system, ideal for maximising space and resources in confined environments like polytunnels. This guide will walk you through the steps of creating your own hydroponic tower, with a focus on materials, tools, and techniques tailored for UK growers.
Vertical Hydroponics
Vertical hydroponics is a method that involves growing plants upwards rather than across horizontal space. Using a tower system, plants are grown in stacked layers, utilising vertical space in a compact and efficient manner. This method is ideal for growers with limited space but a desire to grow a large quantity of crops in a small area, such as a polytunnel.
In a vertical gardening system, plants are typically arranged in a cylindrical or stacked design, ensuring that each plant has access to light, water, and nutrients. Vertical hydroponics can be set up in many ways, but one of the most common is the tower garden, where water flows through the system in a controlled cycle.
Tower Garden
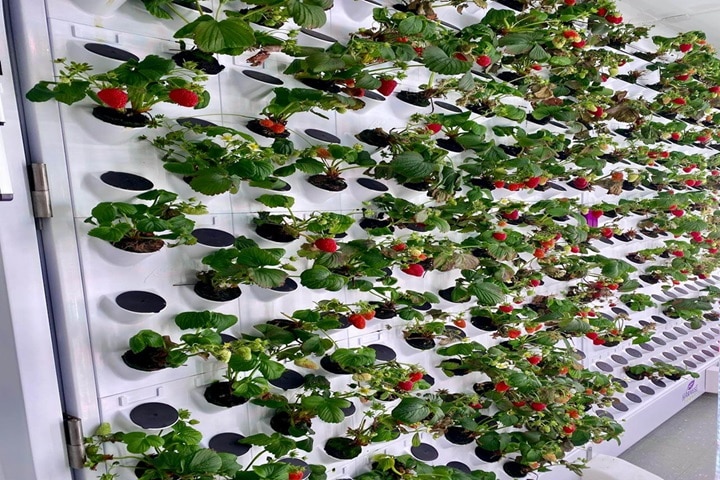
A tower garden is the name used for any vertical growing space with multiple growing levels or tiers. The structure usually has a central column or pipe that holds the growing medium. A tower garden can be watered manually, but one of the best solutions involves making this type of garden part of a hydroponic system.
In a hydroponic system, nutrient-rich water is directed to circulate through this system, supplying plants with everything they need to thrive. This type of system not only conserves space but also, in the case of a hydroponic system, promotes faster growth due to better access to nutrients and water.
For UK polytunnel growers, the tower garden is particularly beneficial for producing crops such as leafy greens, herbs, and strawberries, as it enables year-round growing even during colder months.
Materials Required
Building a hydroponic tower requires several essential materials. You can often repurpose materials or source them locally, making it an affordable DIY project.
- PVC Pipes or Plastic Tubing: These will form the central column of the tower and the vertical growing channels. PVC pipes are durable, lightweight, and resistant to water, making them ideal for hydroponic systems.
- Growing Cups or Net Pots: These are used to hold plants and allow roots to grow downwards while exposed to the nutrient solution. You can either buy purpose-built cups or repurpose cups from other sources.
- Water Pump: A submersible water pump is needed to circulate the nutrient solution through the tower, ensuring plants receive adequate water and nutrients.
- Tubing and Connectors: Flexible tubing connects the water pump to the vertical pipes, ensuring the nutrient solution flows evenly to all sections of the tower.
- Nutrient Solution: Hydroponic plants require a balanced mix of water and nutrients. You can purchase pre-made hydroponic nutrients or create your own mix using water-soluble fertilizers.
- Growing Medium: The growing medium supports the plants and holds moisture. Common options include perlite, vermiculite, and coconut coir. These mediums are inert, meaning they won’t interfere with nutrient absorption.
- Reservoir or Water Basin: The reservoir holds the nutrient solution and allows the pump to circulate it through the system.
- PVC End Caps: These caps are used to seal off the bottom of the tower and the vertical pipes where the solution enters.
- Lights (Optional): If growing indoors or in areas with limited natural sunlight, grow lights can supplement light conditions. LED grow lights are energy-efficient and promote healthy plant growth.
- Tools Needed
You don’t need specialised tools, but having a basic set of DIY equipment will make the process smoother:
- Drill and Drill Bits: To create holes for the growing cups or net pots in the PVC pipes.
- Saw or Pipe Cutter: To cut PVC pipes to the required length.
- Screwdriver and Screws: For securing the structure together.
- Measuring Tape or Ruler: To ensure precise measurements for uniform holes and pipe lengths.
- Sealant or Waterproof Adhesive: For ensuring watertight connections and sealing any leaks.
- File or Sandpaper: For smoothing rough edges on cut PVC pipes.
Steps for Building A Hydroponic Tower
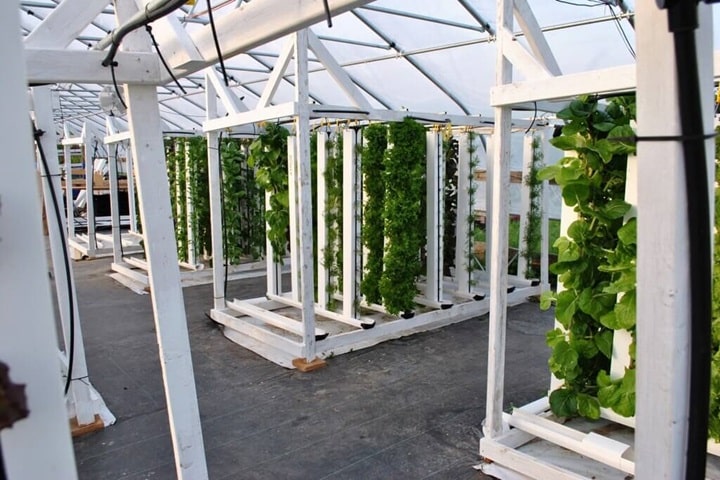
Building a hydroponic tower is a relatively simple process that involves following these steps:
- Step 1: Planning Your Tower Design
Before you start, plan out your tower system. Consider how many tiers you want for your tower and the amount of space available in your polytunnel. Generally, a tower with 4-5 layers works well in a standard-sized polytunnel. Make sure your design includes space for the water reservoir and pump.
- Step 2: Cutting PVC Pipes
- Measure and cut your PVC pipes to the desired lengths. Typically, the central column should be around 1.5 to 2 meters high, with each tier adding about 30-40 cm.
- Cut additional smaller pipes for the water inlets and outlets.
- Step 3: Drilling Holes for Growing Cups
- Use a drill with a hole saw bit to create holes along the sides of the PVC pipe where the growing cups will fit. The holes should be large enough to hold the cups securely, but not too loose to prevent the cups from falling out.
- The holes should be spaced evenly, with a 10-15 cm gap between each hole.
- Step 4: Assembling the Tower
- Attach the PVC pipes to the base. If you are using multiple sections for the tower, make sure to connect them securely using PVC connectors and sealant to prevent water leakage.
- Position the tower vertically, ensuring it is stable. You can use brackets or stakes to secure the structure in place.
- Step 5: Installing the Water Circulation System
- Place the water pump inside the reservoir and connect it to the bottom of the central column using flexible tubing.
- Ensure the pump can circulate the water evenly to all sections of the tower. A gentle water flow is usually sufficient to keep the nutrient solution moving without flooding the plants.
- Step 6: Installing the Growing Medium and Net Pots
- Place the growing cups or net pots into the pre-drilled holes. Fill them with the growing medium of your choice.
- Insert your plants or seedlings into the net pots. Make sure the roots have enough space to grow into the nutrient solution.
- Step 7: Adding Nutrient Solution
- Fill the water reservoir with a nutrient solution. Mix it according to the instructions on the nutrient product you are using.
- Turn on the pump to start circulating the water through the tower. Check that the water is flowing evenly to all levels.
- Step 8: Testing and Monitoring
- After installation, monitor the system for any leaks or irregularities in the water flow.
- Check the nutrient solution’s pH and adjust as necessary, as plants have specific pH requirements for optimal nutrient uptake.
Post Preparation Care
Once your hydroponic tower is set up, maintaining it is crucial to ensure healthy plant growth:
- Water and Nutrient Management: Regularly check and replenish the water and nutrients in the reservoir. The frequency depends on the size of your system, but a weekly check is generally recommended.
- pH Levels: Regularly monitor and adjust the pH levels to ensure optimal nutrient absorption. A pH of 5.5 to 6.5 is typically ideal for most plants.
- Pruning and Harvesting: Prune dead or overgrown foliage to promote healthy growth. As the plants mature, begin harvesting leaves or fruit to allow new growth.
- Cleaning: Every few months, clean the pipes, reservoir, and pump to prevent any build-up of algae or nutrient sludge. This will keep your system running efficiently.
Other Ways to Make a Tower Garden
While PVC is the most common material used for hydroponic towers, there are other alternatives to consider:
- Plastic Bottles: Recycled plastic bottles can be repurposed to create small, individual towers, ideal for limited spaces.
- Wooden Frames: You can build a wooden frame with horizontal tiers, using net pots or pockets to hold plants.
- Metal Pipes or Aluminium: For a more durable structure, you can use metal pipes, which will be especially useful for outdoor towers exposed to the elements.
What to Grow in a Hydroponic Tower
Leafy greens are some of the easiest and most successful plants to grow in hydroponic systems, especially in vertical towers. These plants require minimal space, grow quickly, and have high water efficiency.
Lettuce is one of the most popular choices for hydroponic growing due to its rapid growth rate. Varieties such as butterhead, romaine, and loose-leaf lettuce are well-suited for hydroponic towers. Lettuce thrives in the cool, nutrient-rich environment that hydroponics offers, and it can be harvested in as little as 4 to 6 weeks.
Spinach is another quick-growing leafy green that thrives in hydroponic towers. It prefers cooler temperatures, making it an excellent option for growing in polytunnels throughout the year. Rocket is another fast-growing leafy green that thrives in a hydroponic tower. It has a peppery flavour and is ready to harvest within 3 to 4 weeks.
Kale is a nutrient-dense green that can thrive in a hydroponic system. It’s a bit slower growing than the above but is perfect for year-round production in a polytunnel.
Herbs are another great category of plants for hydroponic towers, as they often have relatively small root systems and can grow well in the controlled, space-efficient environment that vertical gardening offers.
Some smaller fruits and vegetables are also excellent candidates for vertical hydroponic towers, though they generally require more care and attention than leafy greens or herbs. Strawberries, and dwarf cultivars of tomatoes, peppers and cucumber might all be options to consider.
Selecting the right crops will depend on your climate, space, and specific growing goals, but the possibilities are vast. Whether you’re looking to grow fresh salad greens, vibrant herbs, or even strawberries, hydroponic towers allow you to maximise space and produce an abundance of food year-round.
FAQs
What are the disadvantages of a Tower Garden?
While tower gardens have many benefits, there are some disadvantages to consider:
Cost: Initial setup costs, especially if buying ready-made systems, can be high.
Water and Nutrient Management: The system requires regular monitoring to ensure that water and nutrients are balanced.
Space: Although compact, tower gardens still require sufficient space for a pump, reservoir, and light (if indoors).
Maintenance: Periodic cleaning of pipes and reservoirs is necessary to prevent blockages or algae growth.
Do you use soil in a Tower Garden?
Tower gardens do not use soil. Instead, they use a hydroponic growing medium or potting mix that holds the plant roots in place while allowing them to be exposed to the nutrient solution. This eliminates soil-borne diseases and provides plants with more direct access to nutrients.
What is the easiest DIY hydroponics system?
The easiest DIY hydroponics system is a Kratky method or a Wick system. These are simple to assemble and do not require pumps or electricity, making them ideal for beginners. They can be scaled up or down depending on your space.
Sources
Trees.com (2024) The Kratky Method – Grow Food The Passive Hydroponic Way (Step by Step Guide). [online] Available at: https://www.trees.com/gardening-and-landscaping/the-gratky-method