Growing microgreens is a perfect option for beginners and experienced growers alike. Quick and easy, these baby leaves or micro vegetables are perfect for space-saving gardeners. Whether you are growing outdoors, in a polytunnel, or on a windowsill indoors, growing and learning what are microgreens can be a wonderful idea.
Growing microgreens yourself does not require a large garden. In fact, it is something that you can do on a smaller scale without any garden at all. Growing micro-greens is a small-space solution anyone can employ.
Even if you do have a large garden, you can still learn a lot, and increase your yields, by embracing solutions usually employed by those who only have limited space. Growing small green shoots of common crops is just one of those strategies.
You can grow micro-greens in a polytunnel or greenhouse, in a cold frame in your garden, or on a sunny windowsill inside your home.
Microgreens have grown hugely in popularity over recent years, and for good reason. They are fast, versatile, and surprisingly easy to grow, whether you have a large garden, a windowsill, or a small polytunnel. In this guide, I’ll explain exactly what microgreens are, which types are worth growing, how to grow them successfully, and what risks to be aware of before you start.
KEY TAKEAWAYS
- Microgreens are young vegetable and herb seedlings harvested shortly after germination
- They can be grown indoors or undercover year-round, even in very small spaces
- Many common vegetables can be grown as microgreens, each with different flavours and uses
- Microgreens grow quickly, often ready to harvest in 7–21 days
- Hygiene, moisture control, and seed quality are essential to avoid problems
What are Microgreens?
Microgreens are young seedlings of vegetables, herbs, and some grains, harvested when they have developed their first true leaves. They sit somewhere between sprouts and baby leaf crops, both in size and in how they are grown.
Unlike sprouts, microgreens are grown in a shallow growing medium such as compost or coir, and they are harvested above soil level. This makes them easier to handle, more versatile in the kitchen, and generally lower risk when grown carefully.
Remember, these are often simply smaller, younger versions of the plants that can grow to full size as edible crops in a garden. Micro-greens and micro herbs often provide health benefits because they concentrate the vitamins, minerals and antioxidants and therefore pack more punch than full-sized plants.
The nutritional content of each one will, of course, depend on the plant family to which it belongs. Different plant families have different nutritional profiles.
Microgreens are usually harvested when they are around 2–5cm tall. At this stage, they tend to have concentrated flavours, often far stronger than their fully grown counterparts. From my own experience, a small tray can provide a surprising amount of harvest for salads, sandwiches, garnishes, and cooked dishes.
Most microgreens are ready to harvest in one to three weeks, making them one of the fastest crops you can grow at home.
Types of Micro Veg Growing
One of the joys of micro veg growing is the sheer range of plants you can experiment with. Many everyday vegetables can be grown as microgreens, each offering different flavours, textures, and colours.
Brassica Microgreens
Brassicas are some of the easiest and most reliable microgreens to grow.
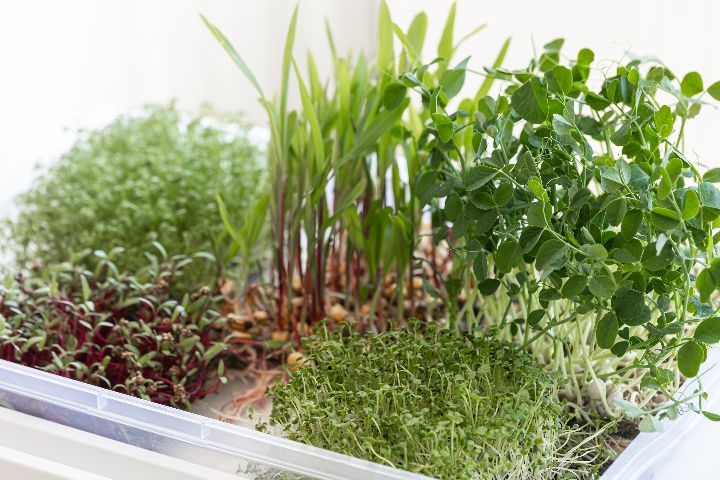
These include broccoli, kale, cabbage, cauliflower, and mustard. They germinate quickly and grow evenly, making them ideal for beginners. The flavour is often mild but fresh, with mustard varieties bringing a noticeable peppery kick.
I grow many different varieties of microgreens from the cabbage family on my windowsill indoors throughout the winter months, as well as harvesting the older brassica leaves from my polytunnel garden throughout the coldest part of the year.
Lettuce and Other Salad Crop Microgreens
Many familiar salad crops perform extremely well as microgreens.
Lettuce, endive, chicory, spinach, and chard can all be grown at this stage. These tend to be milder than brassicas and are ideal if you want microgreens that can be used generously rather than just as a garnish.
These are particularly useful for people who enjoy salads but struggle to grow full-sized leaves year-round.
Herb Microgreens
Herbs can be grown as microgreens, though they usually take longer to germinate and grow.
Basil, coriander, dill, fennel, and parsley all work well, though patience is required. The flavour is often intense, even at this early stage, so a little goes a long way.
Basil microgreens are especially worthwhile if you struggle to keep mature basil plants alive indoors.
Root Vegetable Microgreens
Some root crops are surprisingly good candidates for micro greening.
Beetroot, radish, carrot, and turnip microgreens are grown for their leaves rather than roots. Radish microgreens are particularly fast-growing and deliver a strong, spicy flavour that works well in sandwiches and stir-fries.
Beetroot microgreens also add striking colour, making them popular for decorative use as well as eating.
Legume and Grain Microgreens
Peas, lentils, chickpeas, and even wheat can be grown as microgreens.
Pea shoots are one of the most productive options and can sometimes be harvested more than once. They have a sweet, fresh flavour and a satisfying crunch.
These tend to need a little more space and light than smaller-seeded crops but are well worth growing if you have room.
Growing Micro Vegetables
Growing micro vegetables is straightforward, and this is a type of gardening suitable even for those who do not consider themselves green-fingered at all. But attention to detail makes a big difference to results.
You don’t need much equipment to get started.
Most people grow microgreens using shallow trays, a fine growing medium, clean water, and good-quality seed. Light is important, though a bright windowsill can be enough for small-scale growing.
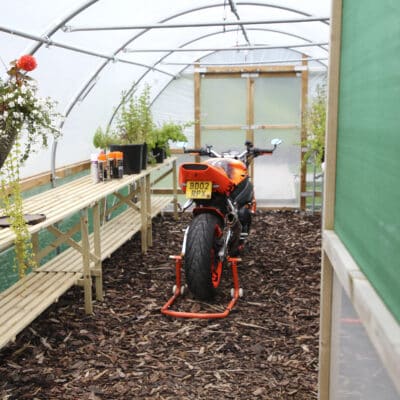
Growing undercover can make the process more reliable. Even compact setups such as small polytunnels allow better control over temperature, airflow, and moisture, particularly in cooler months.
The Basic Process
Start by filling a shallow tray with a light, free-draining growing medium. Firm it gently and water thoroughly before sowing.
Scatter seeds densely across the surface, but avoid piling them on top of one another. Press them lightly into the surface and mist with water. Some seeds benefit from a thin covering of compost, while others can be left exposed.
Keep the tray moist but not wet, and place it somewhere warm until germination. Once seedlings emerge, ensure they receive plenty of light to prevent weak, leggy growth.
Most microgreens are ready to harvest once the first true leaves appear. Use clean scissors to cut just above soil level.
Light, Temperature, and Watering
Microgreens grow best with bright, indirect light. Insufficient light leads to pale, elongated seedlings that are more prone to disease.
Temperature requirements vary slightly, but most microgreens prefer conditions similar to those of seed germination for vegetables – not too cold, and not excessively hot.
Watering is one of the most important factors. Overwatering is a common mistake and can quickly lead to mould or rot. I usually water from below once seedlings are established, allowing the growing medium to absorb moisture without wetting the stems.
Harvesting and Using Microgreens
Microgreens should be harvested fresh and used as soon as possible for best flavour and texture.
They are ideal for salads, wraps, omelettes, soups, and garnishes. I often add them at the last minute to cooked dishes to preserve their texture and flavour.
If you are looking for inspiration, they pair beautifully with many light, seasonal meals and work well with fresh summer food ideas.
Risks of Microgreening
While microgreens are generally easy to grow, there are a few risks and considerations to be aware of.
The main issue is hygiene. Warm, moist conditions can encourage mould or harmful bacteria if equipment is not kept clean. Always use clean trays, fresh growing medium, and potable water.
Air circulation is also important. Stagnant air increases the risk of fungal problems, particularly indoors or in enclosed spaces.
Another consideration is seed quality. Seeds intended for micro veg growing should be untreated and suitable for food use. Using poor-quality or treated seed increases the risk of contamination.
Finally, because microgreens are harvested young, they are not regrown in the same way as cut-and-come-again salads. Most trays are used once and then composted.
Growing Microgreens Under Cover: A Practical Advantage
Growing microgreens undercover offers clear benefits, particularly in the UK climate. Protection from temperature swings, heavy rain, and low light levels makes production far more reliable.
Even a modest protected space allows year-round growing and helps maintain consistent quality. I find that this approach is especially useful in winter, when outdoor growing is limited but fresh greens are still very welcome.
Microgreens are one of the simplest and most rewarding crops you can grow at home. They are fast, flexible, and suitable for gardeners at any level of experience. With a little care and attention, micro veg growing can provide a steady supply of fresh, flavourful greens throughout the year, even when space or time is limited.