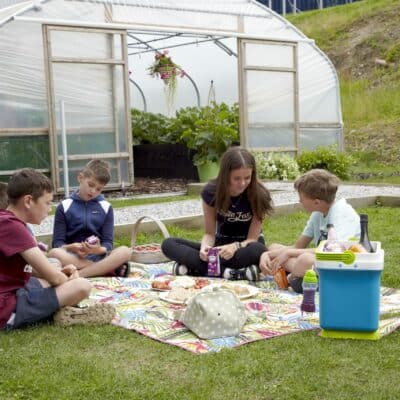
A polytunnel can be a wonderful addition for a community. Whether you are looking at starting a polytunnel garden for a school, youth group, health facility or in a typical community garden, you might be wondering how to get started. So let’s take a look at the process of starting a community polytunnel garden – from choosing and positioning your community polytunnel, to planning what to grow and actually getting started.
Where Might You Place a Community Polytunnel?
The first thing to think about if you would like to place a polytunnel for your community is where one might be located. Here are a few suggested places that you might like to look into:
-
An existing community garden or community allotments. (Allotment holders could perhaps share one larger polytunnel if there is not space for one on individual plots).
-
A public park or communal ornamental garden area. (It might be worth while approaching the council/ authorities about establishing a community garden area on a public site that is being underused.)
-
School play grounds, or the grounds of other council properties like libraries, offices etc..
-
Close to a clinic, doctors surgery or other healthcare facility.
-
On a brown-field site in your neighbourhood that needs something to be done with it.
-
In the grounds of a charity space/ youth group/ scout hut etc..
-
On private property in your community. (If you see a space you’d love to make better use of, it is always worth finding out who owns it, and seeing whether an agreement can be reached.)
It is always worthwhile looking into potential sites. Even when you do not own the space, it is often possible to reach an accord that suits everyone involved. A community polytunnel really can benefit a whole community.
Choosing a Polytunnel
Once you have a general location picked out, it is time to think about choosing a polytunnel. You will need to think about what size of polytunnel would suit the space and your requirements. You will also need to think about what type of cover to choose. And nail down other details about the structure and exactly what you require.
When it comes to a community project, it is good to have a steering committee. But it is also a good idea to canvas opinion from the wider community, to find out exactly what they would like/ need and how they would potentially like to use the space.
Remember, most polytunnels are obviously used for food production. But growing food is not the only way to use a polytunnel. Or you might grow food and use a polytunnel for your community in other ways.
Positioning a Polytunnel
As you think about locations, and about choosing a polytunnel, it is important to bear a few simple things in mind.
-
A polytunnel will usually have to be placed on a relatively flat and level piece of ground.
-
It will (if being used for food production) need to get enough light. So it should not be too close to buildings or trees that will cast too much shade over the structure.
-
It should be in a relatively sheltered spot. (If the spot is not currently sheltered, it might be a good idea to consider adding a windbreak hedge or shelter belt. Ideally, you should think about doing this before positioning your polytunnel.
Designing a Layout
Once you have an idea of how large your polytunnel will be and where it will be positioned, it is a good idea to think about how you will lay out the inside. This is something that you can think about before your polytunnel is even erected. Perhaps even before it is ordered or arranged.
In a polytunnel that will be used by multiple community members, layout is even more crucial. In a domestic polytunnel, it might not matter if paths are narrow and things are a bit of a squeeze. But to ensure your community can use your polytunnel easily and it functions well, you may need more space for manoeuvrer. Keep pathways wide, so two people can pass. And if there are to be different sections for different uses, take this into account.
If growing food, the considerations for a community polytunnel will likely be the same as any other. To minimise disruption and compaction of the soil, make sure all growing areas can be reached without stepping on the beds.
Raised beds can often be a good idea in community polytunnels. They can make the space more accessible to those with lower mobility, and make it easier to garden with kids or with much older people.
One final thing to bear in mind is that there should be plenty of space for potting and planting. Planning the staging well can really make a big difference to the usability of the space.
Getting the Basics In Place
So, you have your plans in place. Perhaps a polytunnel is already on its way. Whether you have already ordered a polytunnel or not, it is never too early to get the basics in place. If you are planning a new community garden where there has not been a community garden before, think about longevity. You should have the basics in place.
Often, this will include water supply (ideally a rainwater harvesting system). And a composting system to ensure long term fertility by recycling nutrients. Get these two things in place before you begin and things should go a whole lot smoother as you begin to use your new polytunnel.
Planning What To Grow
If you have planned a community polytunnel, it is important to remember that what is planted should be a community decision. It is a great idea to gather ideas from a wide range of different people within your community to make sure everyone is happy and feels invested in the project.
Making lists of plants that will grow well where you live and having some votes on which to include could be a democratic way to make your choices without having anything too outlandish suggested that just won’t work. Everyone in your community might love the idea of growing tropical fruits – but it is unlikely to be the best choice here in the UK. Creating a list that can serve as a starting point for discussions can help keep things realistic.
Getting Started
A community polytunnel should be a resource for everyone in your community. (No matter how large or small the community you’ve identified may be). Once the polytunnel is on site, why not hold an event (or an online event) to show everyone the structure erected and discuss your plans. Provide regular updates to everyone, even if they are not directly helping with sowing and planting. This can help avoid any resentments and allow everyone to feel some sense of pride and ownership about the project.
If more than one group will be using the polytunnel, make sure you have clear rules in place. Make sure you create schedules so everyone know’s what is happening when. Be organised. Getting rules and structure in place early on may not seem like a lot of fun. But it can save a little of hassle down the road if things are simple and clear from the get go.
Who can use the polytunnel? How are chores to be managed and shared? Who has a share in the harvest, and who can take what, and when? Making sure everyone has the answers to these questions is crucial as you begin to use your new community polytunnel.
When well managed, a community polytunnel can be an amazing resource. Could you use one where you live? And if so, how will you use it? Share your thoughts in the comments below.