


If you have successfully grown your own food at home, one way to elevate your efforts and make your gardening even more sustainable and eco-friendly is to start seed saving. Saving seeds from the plants you grow can be beneficial to you, to the natural world, and to humanity as a whole. Seed saving is one more way to do good in your garden.
What Is Seed Saving?
When we talk about seed saving we are referring to the process of collecting and storing seeds from the plants that we grow to sow the following year, or to swap, sell, or simply pass on to others who may need them.
Seed saving was the norm for food producers for much of human history and it is only in more recent times that many have become divorced from this important process. Some today leave seed saving to expert outfits. But in many cases, this is something we can do ourselves at home, even as novice gardeners.
Is Seed Saving Illegal?
Seed saving is not illegal in most instances, so you do not usually need to concern yourself with this if you are a home gardener.
The only times that you may run into legal issues is if you are a commercial farmer growing patented hybrids or GM crops. Farmers may sometimes need to sign documents to agree to use seeds only for one commercial crop, in which case they would be in breach of contract if they collect seeds to sow in subsequent years.
Many do not like the strangle-hold that mega- agribusiness has within some areas of farming, and are working to give farmers more options by expanding the number of open-source plant varieties that growers can freely share and save.
Why Is Seed Saving Important?
Seed saving is a good idea because it:
- Means that you won’t have to spend money on seeds for next year.
- Ensures that you get organic seed from your organic garden, and don’t need to worry what might contaminate the seeds you use in your garden.
- Allows you to boost resilience and become more self-reliant, lessening your vulnerabilities due to reliance on potentially fragile external systems.
- Allows you to select for seeds that will grow into plants better and better suited to your particular growing environment over time.
- Helps to protect genetic diversity, species and cultivar diversity in our food systems, safeguarding plants for our future.
You will need:
In order to save seeds you will of course need some crops or other plants from which you can save them. These plants should be as healthy and happy as possible, so it will be important to understand gardening basics and know what you need to know for different species when it comes to placement and care.
For seed saving you may also need:
- Cloches, row covers or other coverings to isolate plants for seed saving and prevent unwanted cross-pollination.
- Secateurs or other tools to collect seed heads/ flowering stems etc…
- Paper bags or other receptacles to collect seeds.
- Containers and sometimes other tools for threshing and winnowing seeds.
- Jars, water etc.. to separate seeds from certain fruits.
- Envelopes or other containers for seed storage.
- A pen for labelling to make sure you can keep track of seeds you store.
Of course, further specifics of what you need will depend on the specific seeds that you are looking to collect and save.
Quick Facts
Seed saving basics involve understanding where seeds are to be found on particular plants, when these mature, and how they can be collected. It is important to understand that some seeds are much easier to collect and save than others.
To save seeds successfully you need to know:
- The lifecycles of different plants. (Whether they are annual, biennial or perennial.)
- Pollination details. (Whether plants are wind pollinated/ insect pollinated etc..), whether plants are self-fertile, and when and where cross-pollination will occur.
- Which plants will come true from seed, (growing into copies of the parent plant) and which (F1 hybrids) typically will not.
- Which plants will reliably self-seed in your garden, and when you will need to collect and sow the seeds yourself at a later time.
Suitable for:
Once you have the basic details above for a particular plant species and specific variety, you can work out whether or not you can easily save your own seeds at home.
Most flowering plants will produce seed, and in many cases, you will not need any specialist in-depth knowledge or tools to collect and store those seeds to sow later in your garden.
You might collect seeds from many trees, shrubs and herbaceous plants that you grow in your garden but a good place to begin is often with the plants growing in your annual vegetable garden – be they fruits, vegetables, herbs or flowers.
When to Collect and Store Seeds
Most seeds are collected towards the end of the growing season, in mid to late summer or autumn. Though of course the seeds of different species can also be produced at other times of the year.
If you would like to collect and store seed from a specific species then it is important to understand its lifecycle so that you know when the seed will be fully mature. You need to make sure that the seed you collect has had the chance to mature and ripen fully, as immature seed usually won’t germinate, or sprout, successfully.
How to Collect Seeds
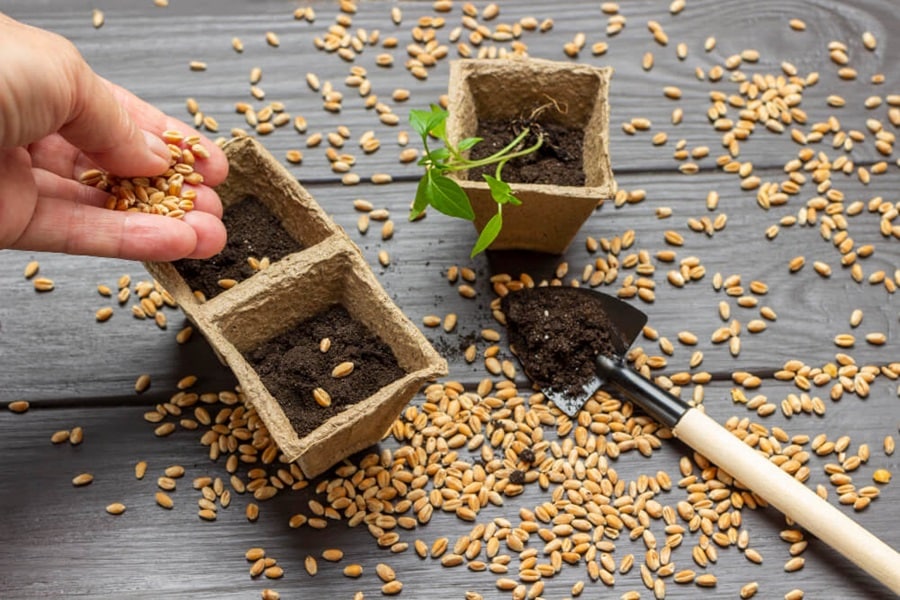
The actual process of collecting seed can vary considerably depending on the specific type of plant and species in question.
Types of Seedheads
In order to begin to hone in on the methods required to collect different types of seed, we first need to take a brief look at plant anatomy, and the different locations on a plant in which seeds can be found.
Flowers often have obvious seed heads, which form once flowers fade. Seed heads are defined as a seed-containing part of some plants that develops after flowering or fruiting. Sometimes, the seeds are easy to find, in other cases, they may be somewhat more hidden.
Seeds can also form within fruits, berries or nutshells. They can be encapsulated in capsules, winged capsules, cones, catkins or pods…
The methods that we use to collect the seeds will depend in part on the form of ‘natural packaging’ in which they come.
Collecting Seeds
Collecting seed often involves getting your timing just right. You need to know what a specific plant should look like when the seeds are nearing ripeness, and how to identify when seeds of a particular type are ready to gather in.
Often, you will need to collect seed in a timely fashion, before the seeds are released, dispersed on the wind, or spill out of their natural containers onto the ground.
In many cases, the seeds need to be separated from the dried plant material surrounding them. This may simply involve hanging the plants upside down in a paper bag so that the seeds drop out into the bottom of the bag. But it can also involve more complex processes of crushing, beating or rolling, before winnowing techniques are used to separate seeds from the chaff.
Collecting seeds from fleshy fruits and berries will involve a somewhat different process. Seeds may sometimes simply be extracted from the fruits or berries and rinsed. Sometimes, as in the case of tomatoes, for example, a more complex process may be involved. (More on collecting seeds from tomatoes below.)
Storing Seeds
Seeds must usually be dried thoroughly before they are put away as otherwise they can often rot in storage, or become unviable. However, there are certain exceptions and some seeds must remain damp in order to remain viable.
Viable seeds are those that will still germinate – sprout – successfully. In order to remain viable seeds need to be stored in suitable conditions. It is important to research where the seeds that you have decided to save should be stored.
In many cases, seeds should ideally be stored in paper envelopes or similar in a perfectly dry airtight container, and placed somewhere cool and dark.
Problems
A lack of seed to collect in the first place is one of the main barriers to successfully saving seed.
Remember that some plants will not produce seed as they are sterile, and others may be male plants that will not ever produce seed. But lack of seed production may also be due to poor growing conditions or inadequate care. It may be down to poor pollination or a lack thereof. Keep plants happy and healthy so they can successfully produce seed.
Another common problem is that saved seeds are not stored correctly, and so lose viability before the time comes to sow them. Make sure the seeds are stored in the conditions they need, and are not exposed to the wrong temperatures etc…
What Are the Easiest Seeds to Save?
Many seeds are easier to save than you might think. But as mentioned above, it is a good idea to start with some of the plants you might grow in your vegetable garden. Saving the seeds from beans and peas can be particularly easy and straightforward.
How To Save Bean And Pea Seeds
Green beans (Phaseolus vulgaris) will all be great for saving as seeds. You simply need to leave some of the beans on your best plants to mature fully and turn brown. The dried beans within the pods can be fully dried, stored and used later for food or kept and replanted the following year.
Collecting the seeds from five or so plants is usually enough to maintain the genetic diversity needed for a healthy bean population. Bean seeds will usually be ready to collect for storage around six weeks after those beans were ready to eat.
If frost threatens before they are ready, you can take a whole plant up by the roots and hang it upside down in a frost free place to allow the seeds to mature fully.
Peas are also definitely to be counted amongst the easiest seeds to collect. Peas rarely face any problems with cross pollination and plants grown from seed will usually ‘come true’ – ie, they will be the same as the parent plant.
Peas for seeds can be harvested when the pods become fully brown and dry. This will usually happen around four weeks after the peas were mature and ready for harvest.
It is a good idea to allow some of the pea pods from your best and healthiest plants mature to provide seed for next year. Simply remove the pods and store the seeds. Placing dry seeds in a jar with some rice will help them remain dry and viable until you want to plant them out.
How To Save Lettuce Seeds
After blooming lettuce seeds will take somewhere in the region of twelve to twenty four days to get to the point where the seeds are ripe. There are a lot of different varieties of lettuce of course, and if you are saving seeds then you should isolate each variety by covering it if there is more than one variety blooming at the same time. Collecting seeds from your healthiest plants mid-season is a good way to ensure a good quality of seed. To get plenty of seed for next year you will usually only have to collect seeds from one or two of the best plants of each variety that you wish to grow.
There are various ways to collect lettuce seeds. One of the simplest ways is to wait until the lettuce seed heads are drying out but have not quite dried out entirely. You should they take each plant and hang it upside down in a dry, cool place in a paper bag for a couple of weeks to dry out fully. Seeds, along with the chaff and some debris, will fall into the bottom of the bag. Seeds from brassica plants can also be dried out and collected in a similar manner.
After you have collected the dried seeds and chaff, place them in a large bowl. Separate the seeds from any larger plant pieces. Winnow the seed by gently swirling the bowl and blowing air over the pile of seed and chaff. The lighter chaff will be separated and can be blown out of the bowl. If there is lots of dust in with the seed then you can shake it gently over a fine sieve. Continue to process until the seeds are left with very little other plant material. Once this is done then you can simply label and package the seeds and store them with any other seeds you have.
How To Save Tomato Seeds
Tomato seeds are easy to collect. First of all, take note and tie a tag to the healthiest and best of your tomatoes – the ones you would like to use for seed. This will help you ensure that you do not accidentally eat all the best tomatoes and forget which you were meant to be saving.
When your tomatoes are very ripe, cut them from the plant and clean them thoroughly. Then, cut each one open and scoop out the seeds and the pulp. Place the seeds and pulp into a container with a lid – a glass jar is ideal. You will notice that the seeds are coated in a sort of jellyish substance. The next stage of the process is fermentation. Fermentation is the way to remove that gelatinous coating from the seeds, along with germination inhibitors and other contaminants. It may also get rid of some seed-borne diseases.
Pour water in with the seeds in the jar. After a few days, a mould will begin to form. This will begin to break down the coating around the seeds. When the mould has formed, tip your seeds out of the jar and rinse them thoroughly with cold water to remove all the mould.
You can they leave your seeds out to dry on a plate or a piece of kitchen roll. When the seeds are thoroughly dry you can then store them in paper envelopes in a cool, dark, dry place. Well stored tomato seeds can be viable for up to six years.
Seed Saving Tips
- Be selective – only save seeds from the best and healthiest plants.
- Plan ahead – sometimes plants from which you wish to save seed will need to be isolated from other plants. Sometimes you will need to be extra vigilant to stop other plants flowering so that seeds deliver desired results.
- Begin with easy crops and process to more challenging ones as your skill and confidence grows.
FAQs
How do I save my seeds for next year?
Select seeds to save, identify where they are and understand when they will be ready for a specific species. Then follow guidelines for seed saving and seed storage for that specific plant in order to save the seeds to sow the following year.
What can I use to save seeds?
Any clean, dry receptacle can be used to store seeds for next year. Keeping seeds in paper envelopes within a sealed glass jar or other airtight container and placing this somewhere cool can often work best.
How can we save seeds?
Saving seeds involves allowing plants to go to seed, harvesting the seeds when they are mature, and properly storing them for future planting. Follow specific guidelines for each plant type to ensure successful seed saving.
Sources
Schipani, S., (2023) The easiest plants to save seeds from for your 1st time. Bangor Daily News. [online] Available at: https://www.bangordailynews.com/2023/11/30/homestead/how-to-save-seeds-n6hjn1me0n/ [accessed 22/12/23]






